Outdoor stairs wood + landing + 9x9 banister rail straight
This product is manufactured upon order; Manufacturing within 10 to 15 working days + shipping 2 to 5 working days
Outdoor stairs wood + landing + 9x9 banister rail straight
Outdoor balustrade stairs with landing and banisters up to 295cm high!
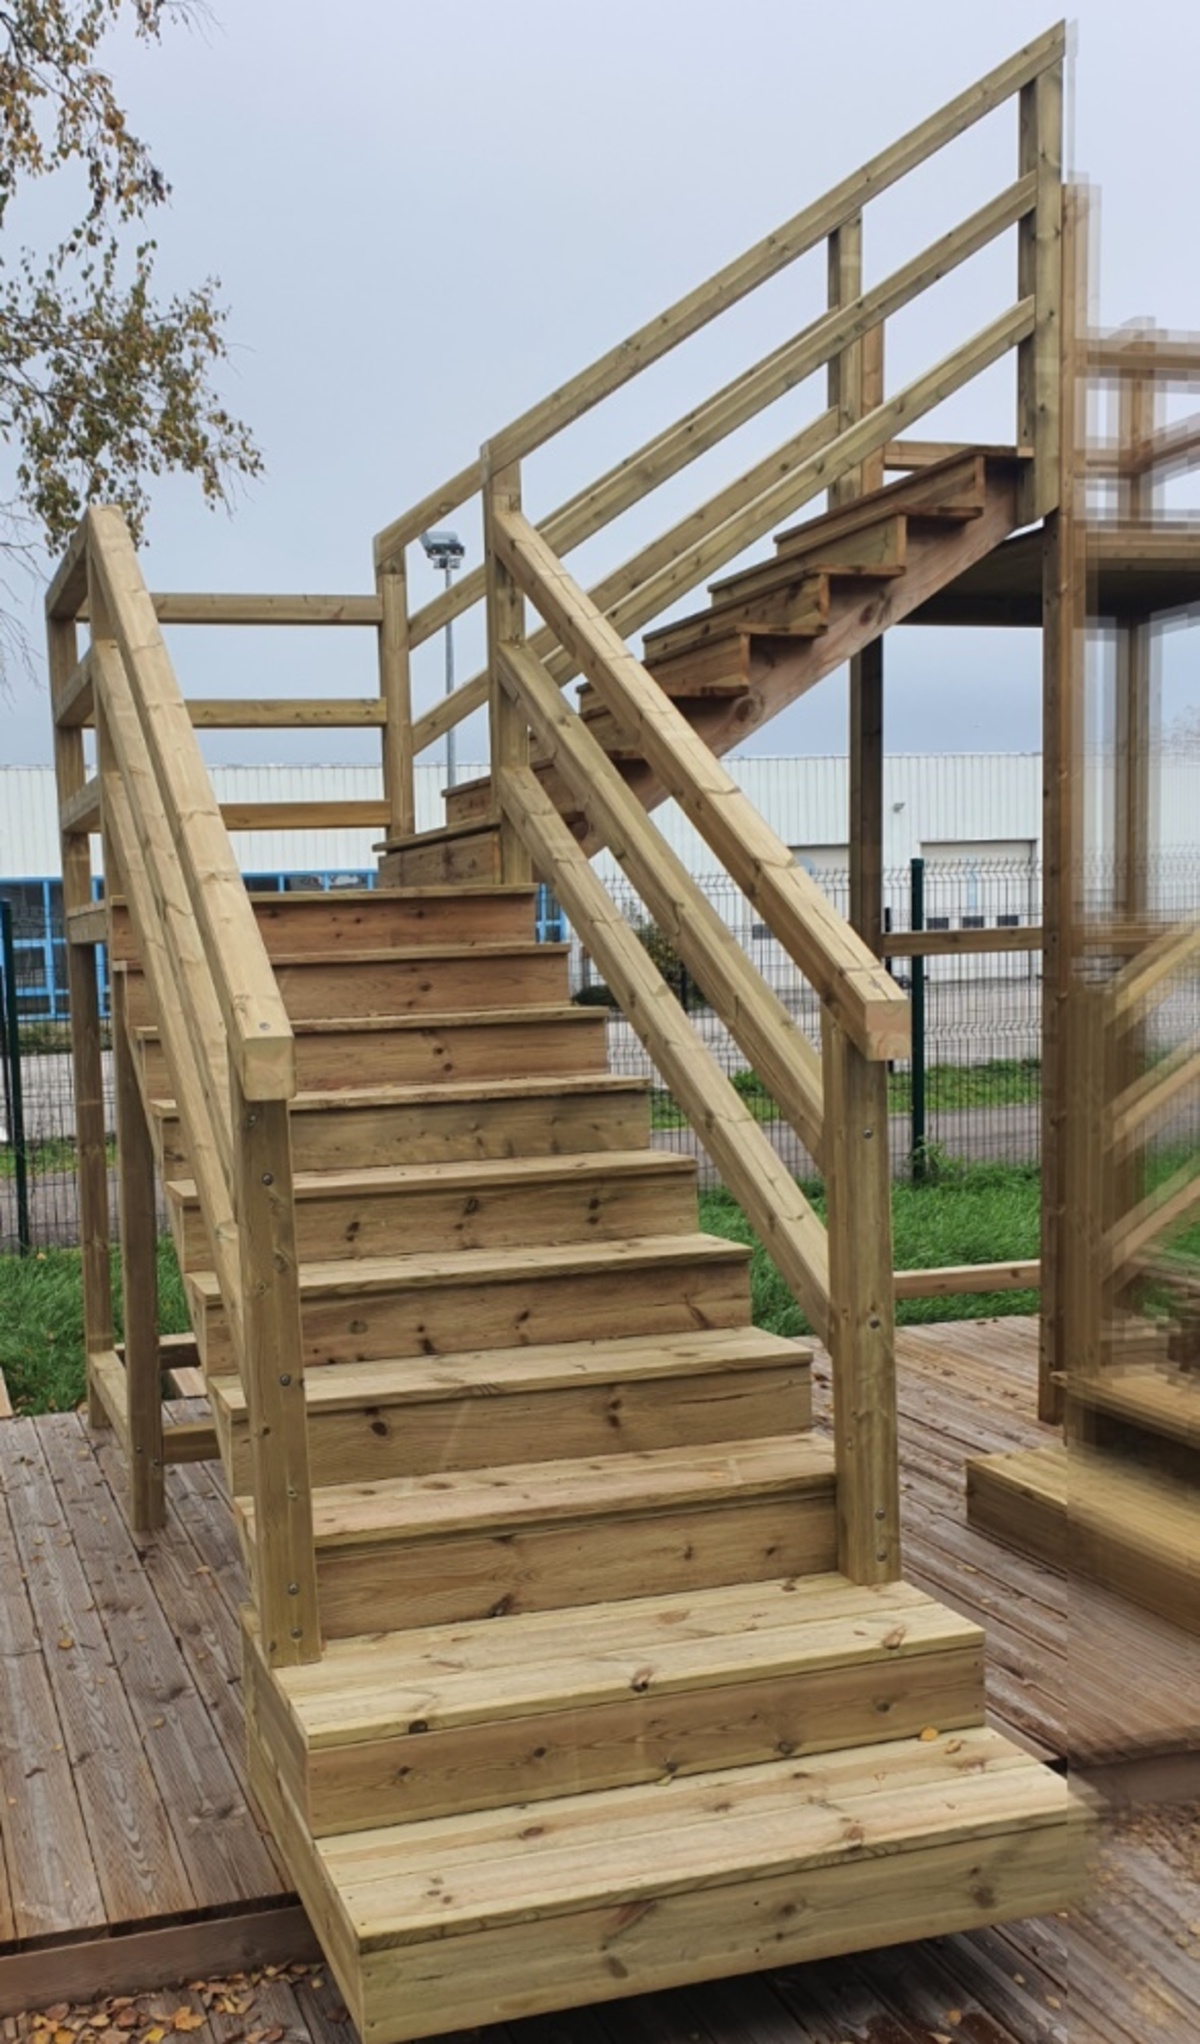
Depending on the height, your balustrade stairs will consist of the following elements :
- loose modular step: these are loose step modules which will be shoved under the first staircase, you can see them at the bottom of the picture, these steps do not have any banisters.
- The first flight of deck stairs, with banisters, up to the landing.
- The landing with balustrades, the landing is always one step higher then the last step of the first deck stairs.
- The second deck stairs with banisters, from the landing up to the wall, balcony or terrace at the top of the stairs.Please note that the long posts which have been blurred on the picture, are not included in the building kit. The second deck stairs have to be fixed agains a support.
You're courageous! A real hero !
Ehm, why is that?
Well, you want deck stairs, with banisters, and a landing....
DWe think that's quiet courageaous...
Yeah, right, funny, why is that then?
You will find out I you have enough courage to read this page all the way to the end ( just loading the page will probably already take some time with your slow WIFI connection...)
There are so many possibilities that it becomes hard to choose.
Not to worry, we will explain everything, so you will soon have a beautiful, sturdy outdoor stairs with banisters and landing.
These balustrade stairs are made of impregnated wood with a straight finish. This gives the outdoor stairs with banister a more modern look then the more classic model with a round headed finish.
These deck stairs with landing and banisters are available up to a maximum height of 295cm.
This model is delivered as a building kit. All parts are cut to size in our own workshop and almost all screw holes are pre-drilled. We also explain below what is not pre-drilled and why.
How to choose your balustrade stairs in our configurator?
Here below we will explain to you which choices you have to make on to what you have to pay attention in order to select the balustrade stairs that fit in your garden.
Step 1: Choose the height of your balustrade stairs:
The following heights are available, make your choice in the selection box at the top right of this page
Height | Number of steps |
54cm |
3 steps |
71cm | 4 steps (1 stairs 3 steps + landing = 4 steps in total) |
88cm |
5 steps |
105 cm | 6 steps (1 stairs 5 steps + landing = 6 steps in total) |
122 cm | 7 steps (1 stairs 6 steps + landing = 7 steps in total) |
139 cm | 8 steps (1 stairs 7 steps + landing = 8 steps in total) |
159 cm |
9 steps |
176 cm | 10 steps (2 loose modular steps + 1 stairs 7 steps + landing = 10 steps in total) |
193 cm | 11 steps (1st stairs 7 steps + landing + 2nd stairs 3 steps = 11 steps in total) |
210 cm | 12 steps (1st stairs 7 steps + landing + 2nd stairs 4 steps = 12 steps in total) |
227 cm | 13 steps (1st stairs 7 steps + landing + 2nd stairs 5 steps = 13 steps in total) |
244 cm | 14 steps (1st stairs 7 steps + landing + 2nd stairs 6 steps = 14 steps in total) |
261 cm | 15 steps (1st stairs 7 steps + landing + 2nd stairs 7 steps = 15 steps) |
278 cm | 16 steps (1 loose modular step + 1st stairs 7 steps + landing + 2nd stairs 7 steps = 16 steps) |
295 cm | 17 steps (2 loose modular steps + 1st stairs 7 steps + landing + 2nd stairs 7 steps = 17 steps in total) |
Step 2: Choose the width of the steps of the balustrade stairs:
Total width: | Free width between the banisters: |
80cm | 63cm (which is really not much at all) |
100cm | 83cm |
120cm | 103cm |
140cm | 123cm |
160cm | 143cm |
180cm | 163cm |
These balustrade stairs are standard available in the widths 80 - 100 - 120 - 140 - 160 - 180cm.
PAY ATTENTION : This width is the total width of the balustrade stairs.Between the posts of the balustrades/banisters on the left and on the right, the next width remains available:
60cm is really to tight, it would thus only leave a width of 42cm between the banisters, with a width of 80cm, this becomes 63cm.
This is really not enough in order to comfortabely walk up and down the stairs.
100cm width is fine, and wider is even better. That will leave you more space in case you arrive with a big bag of groceries, or if you have kids. (or to avoid stepping on the cat that is always sunbathing in the middle of the stairs...)
Step 3: Length of the landing:
By default, we offer this balustrade only with a square landing in the same width as the stairs. This is to ensure the balustrade fits nicely into the whole.
A larger landing is possible. We can even build you a complete balcony or terrace on posts. Because of the thousands of possibilities this is only possible on request.
(And preferably not in the high season from March to late September, then we really do not have time ...)
Step 4: Balustrade placement:
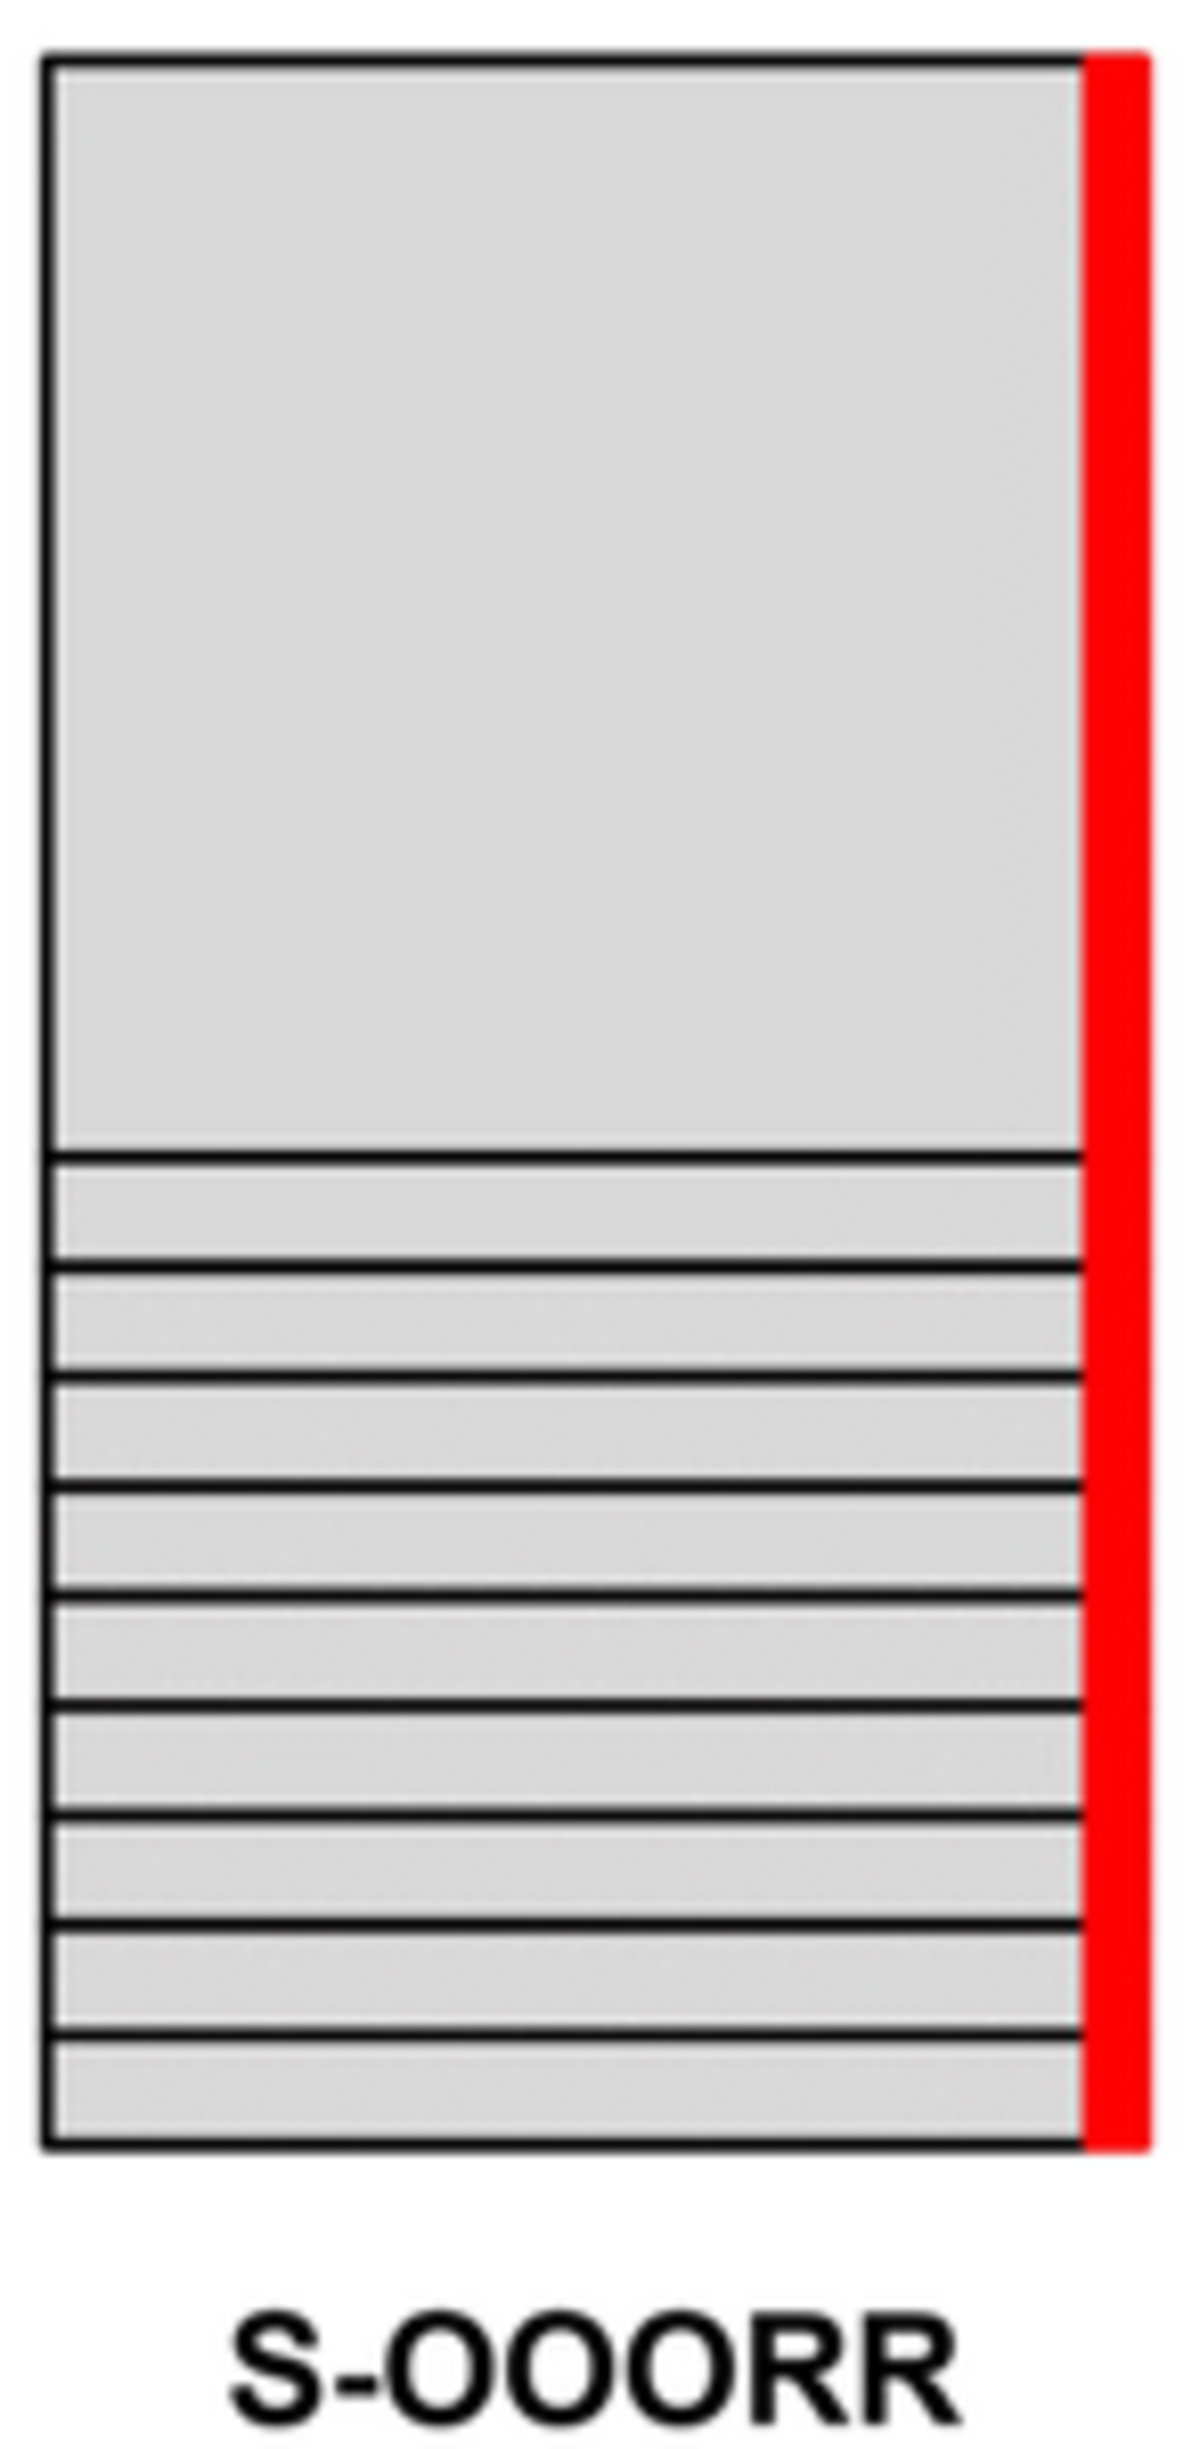
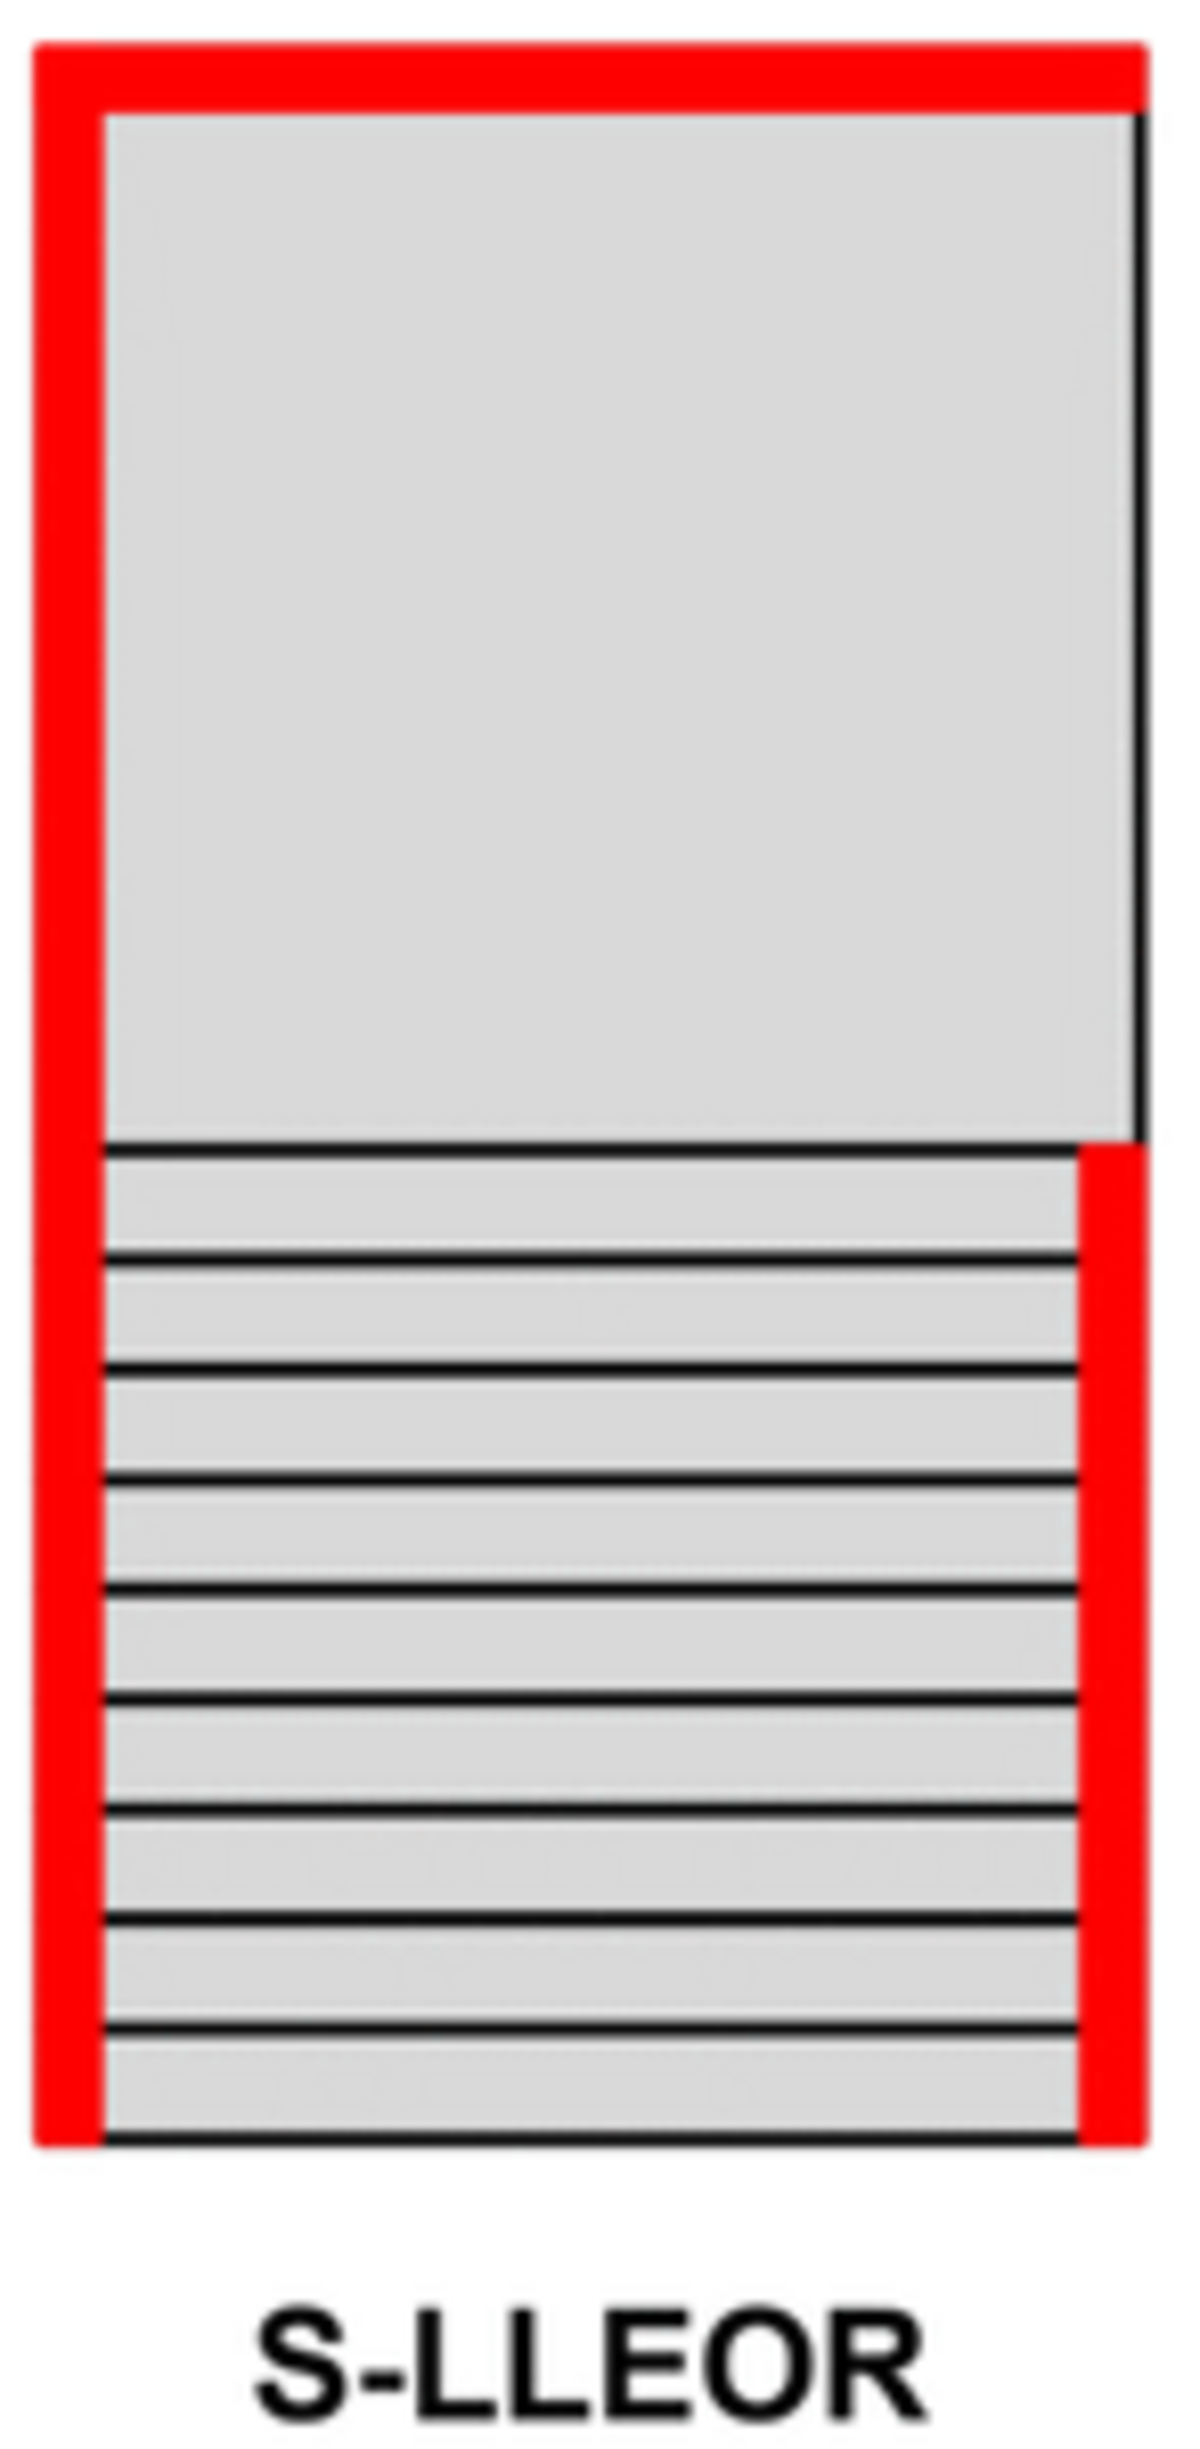
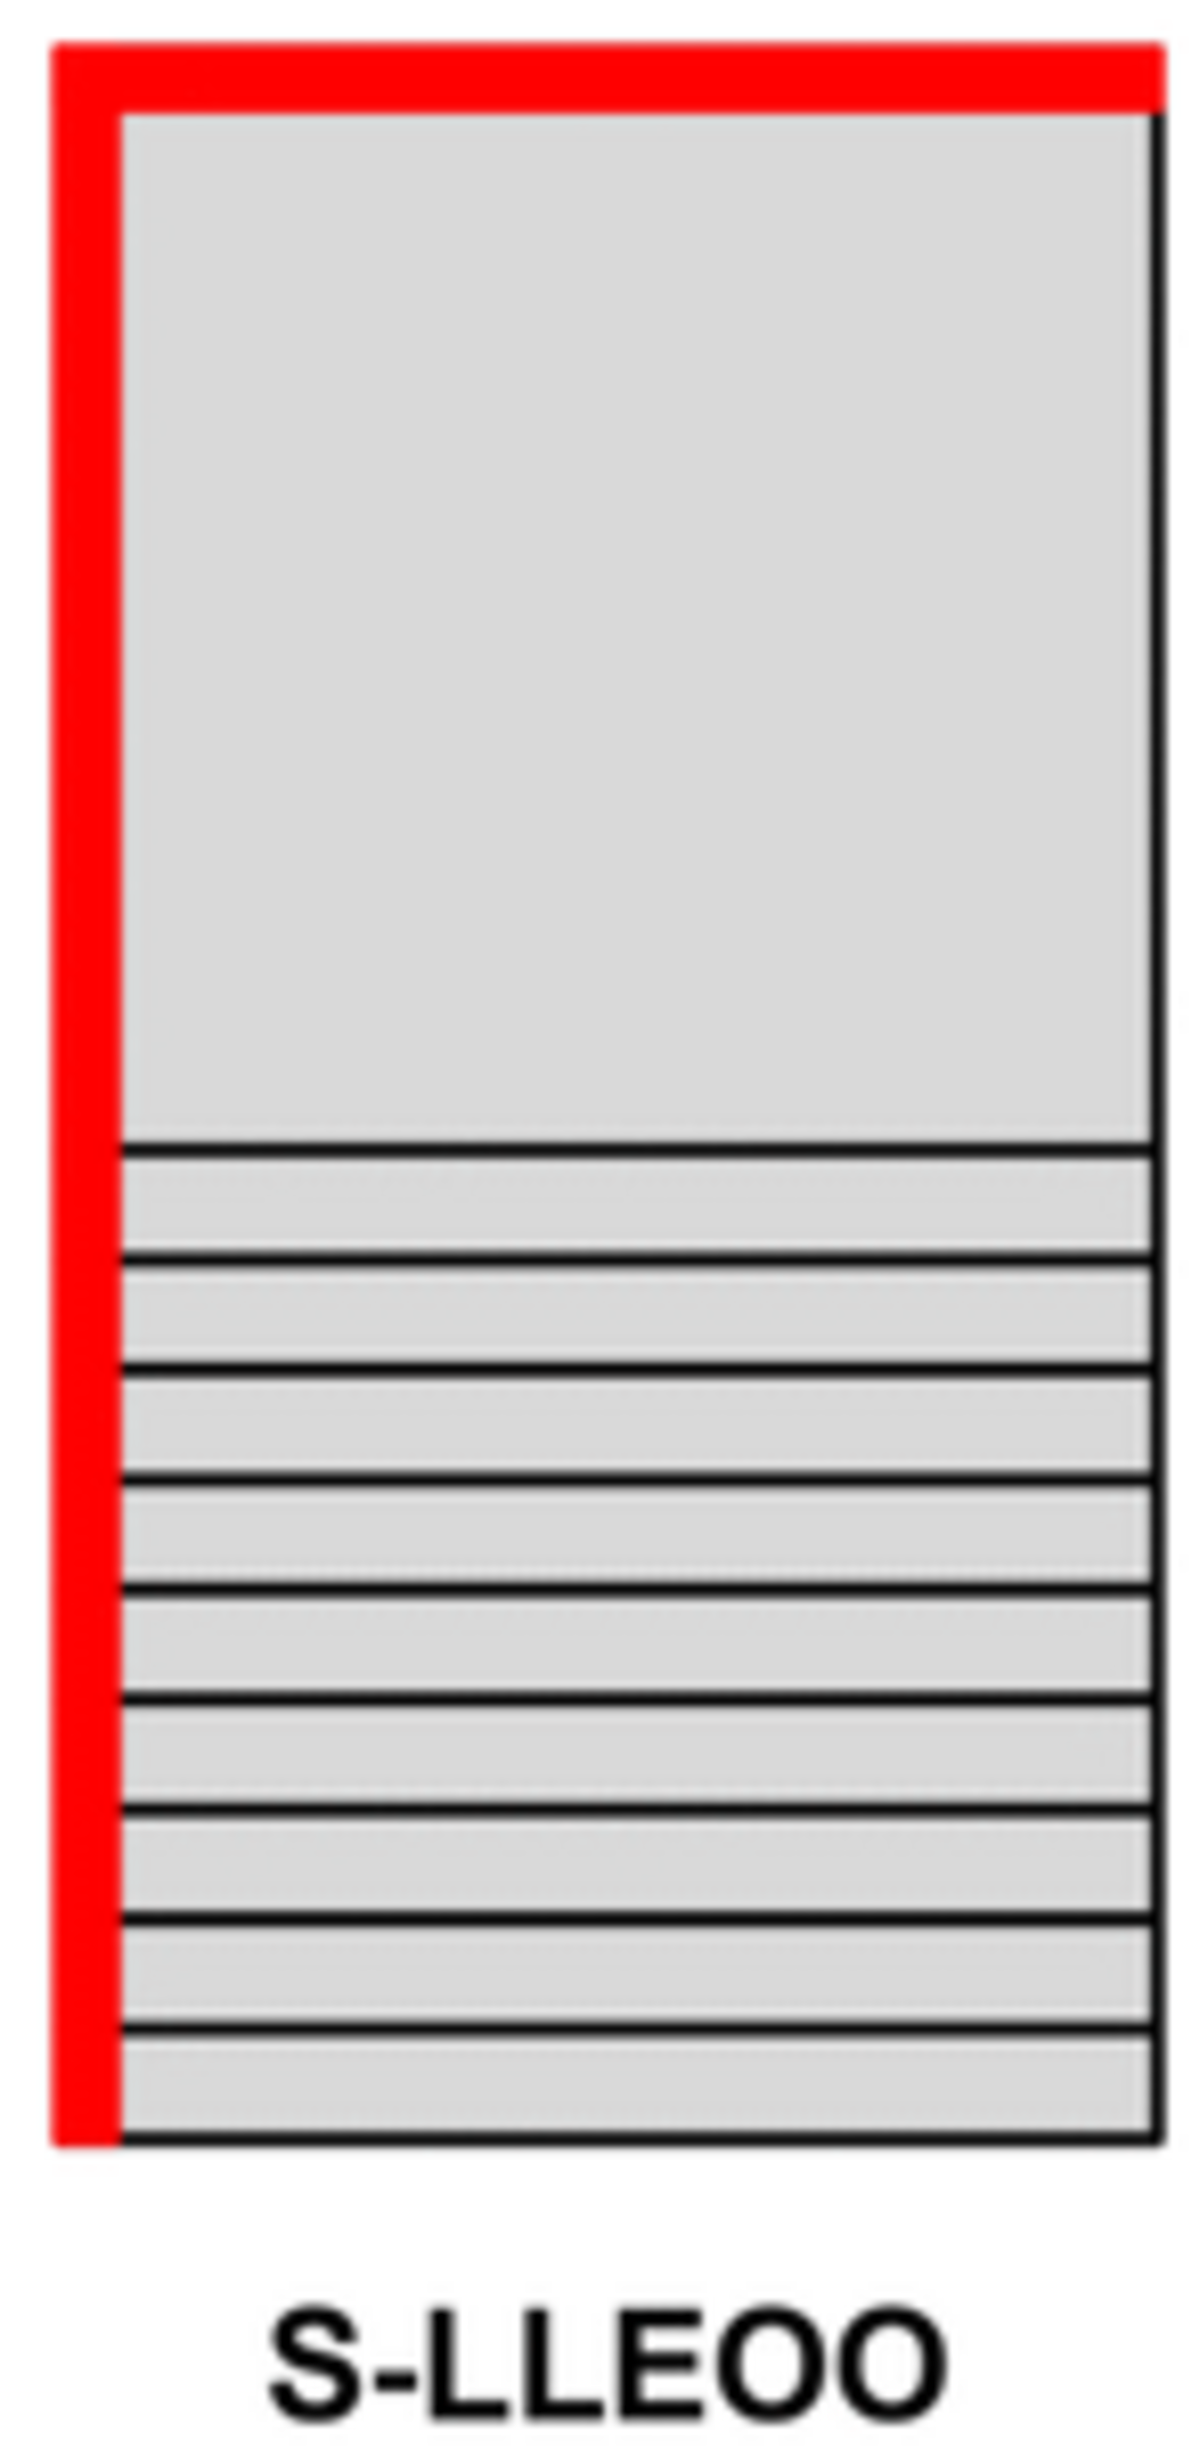
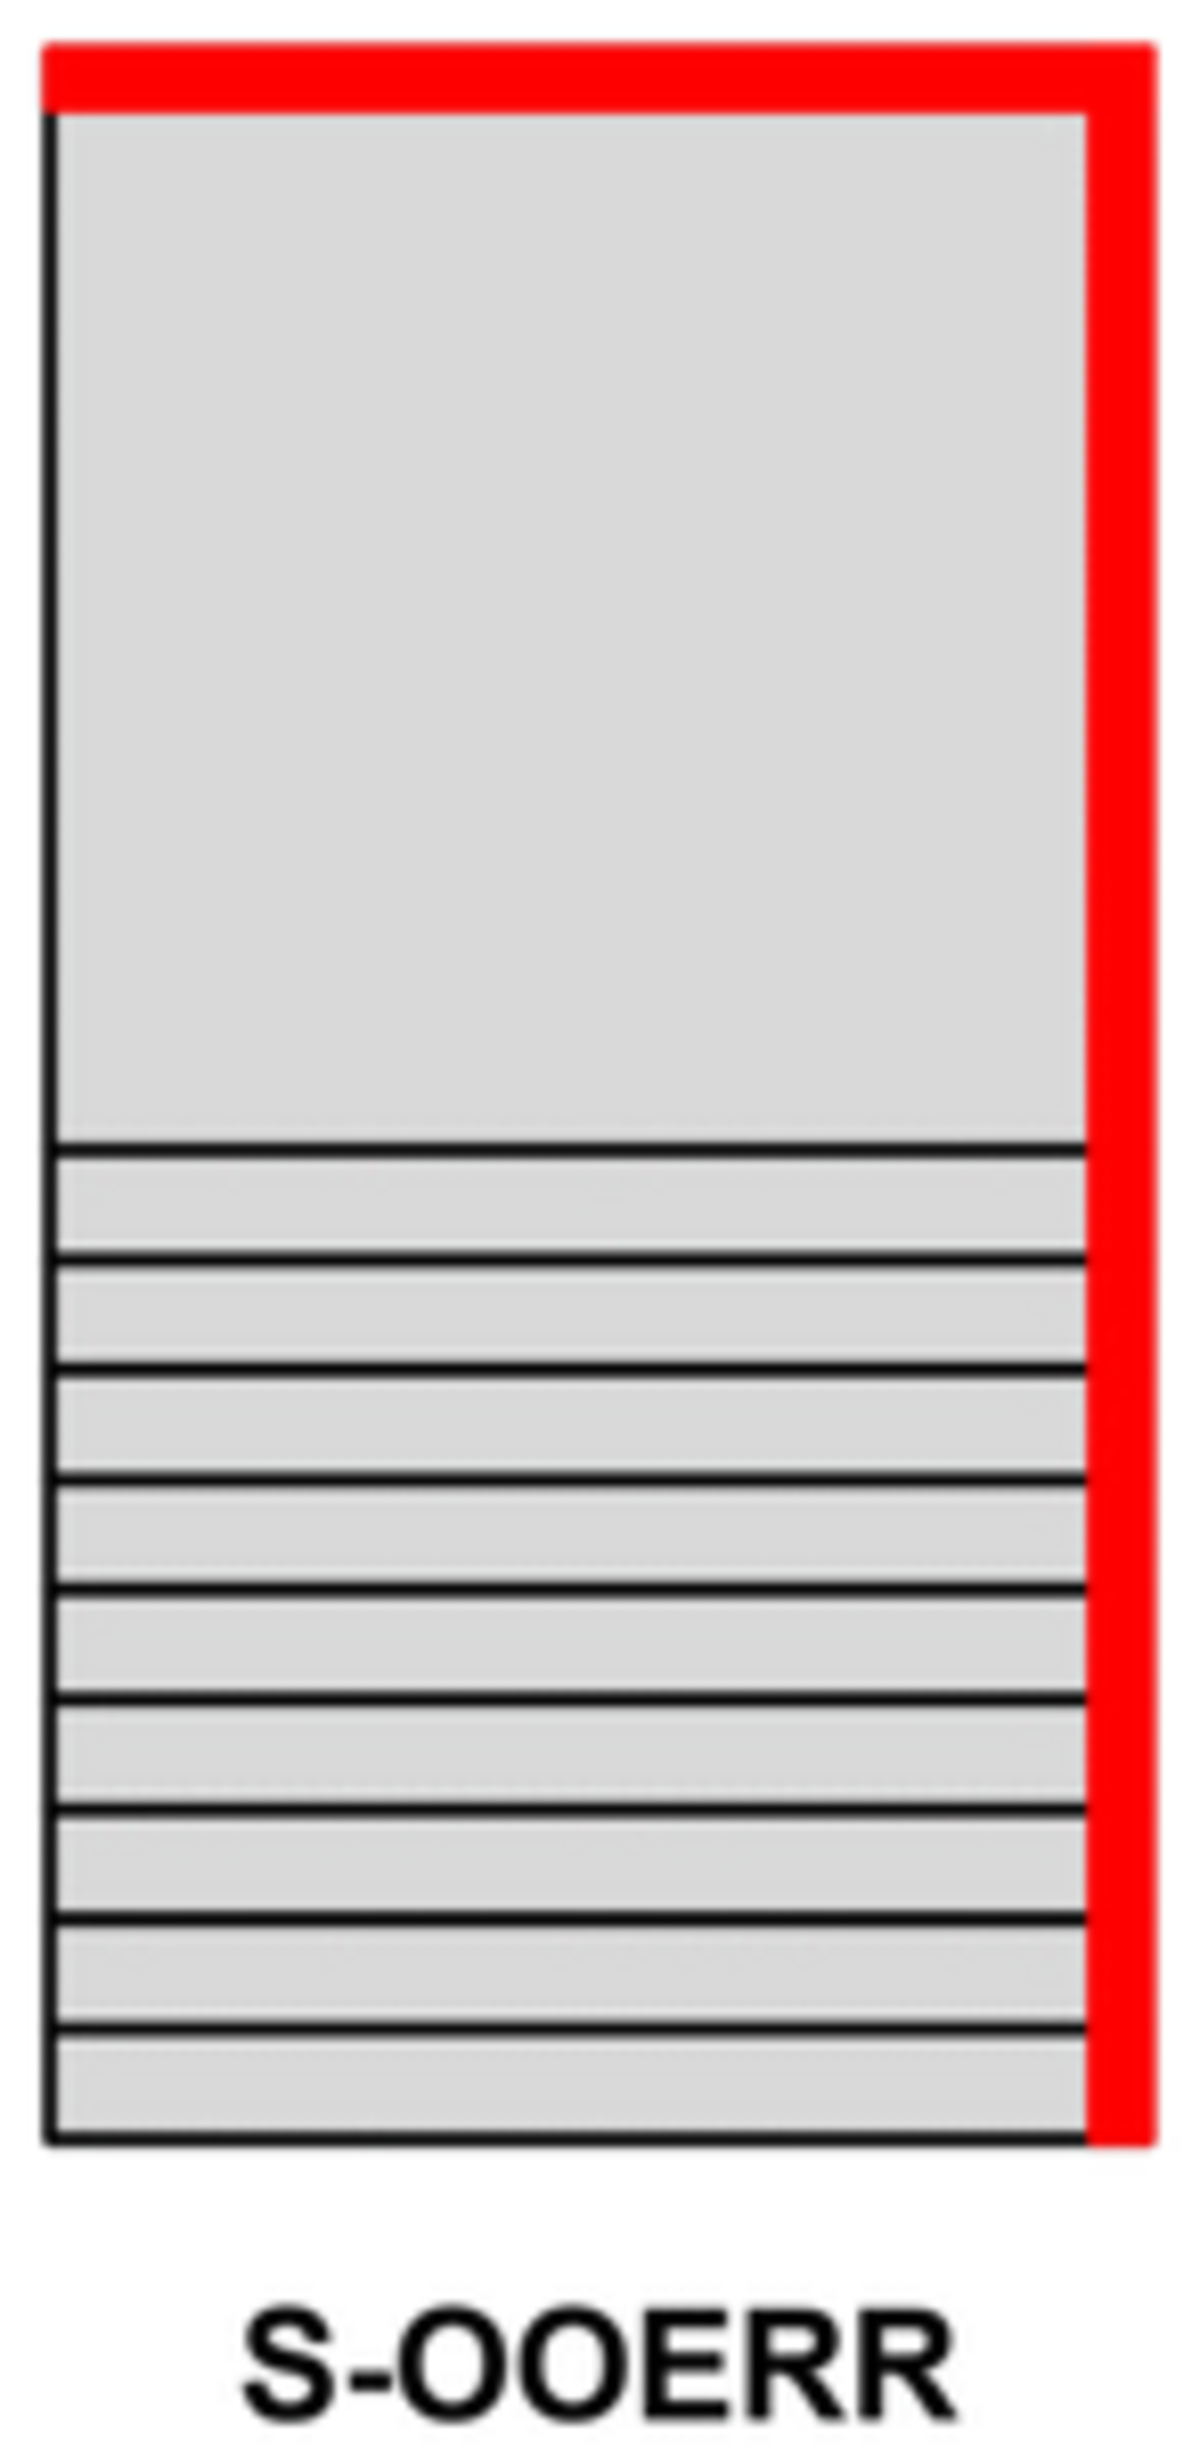
In terms of balustrade placement on the stairs and landing, we offer 15 (!) options.
Some of the choices may seem illogical at first glance.
However, we have noticed that some customers are in very unusual situations, so we prefer to explain them all anyway.
The prices of hundreds of combinations have already been calculated, for many other not yet. Even for us, unfortunately, it is an insane amount of work to draw out and calculate all the possibilities.
Is the model of deck stairs with balustrade that you need not yet on the list? Just ask customer service, and we will calculate your deck stairs as fast as possible.
Just keep your spirits up.
We will now explain how to choose...
To keep things clear for our workshop and administration, we had to come up with codes that are also part of the item number.
We're going to explain those first:
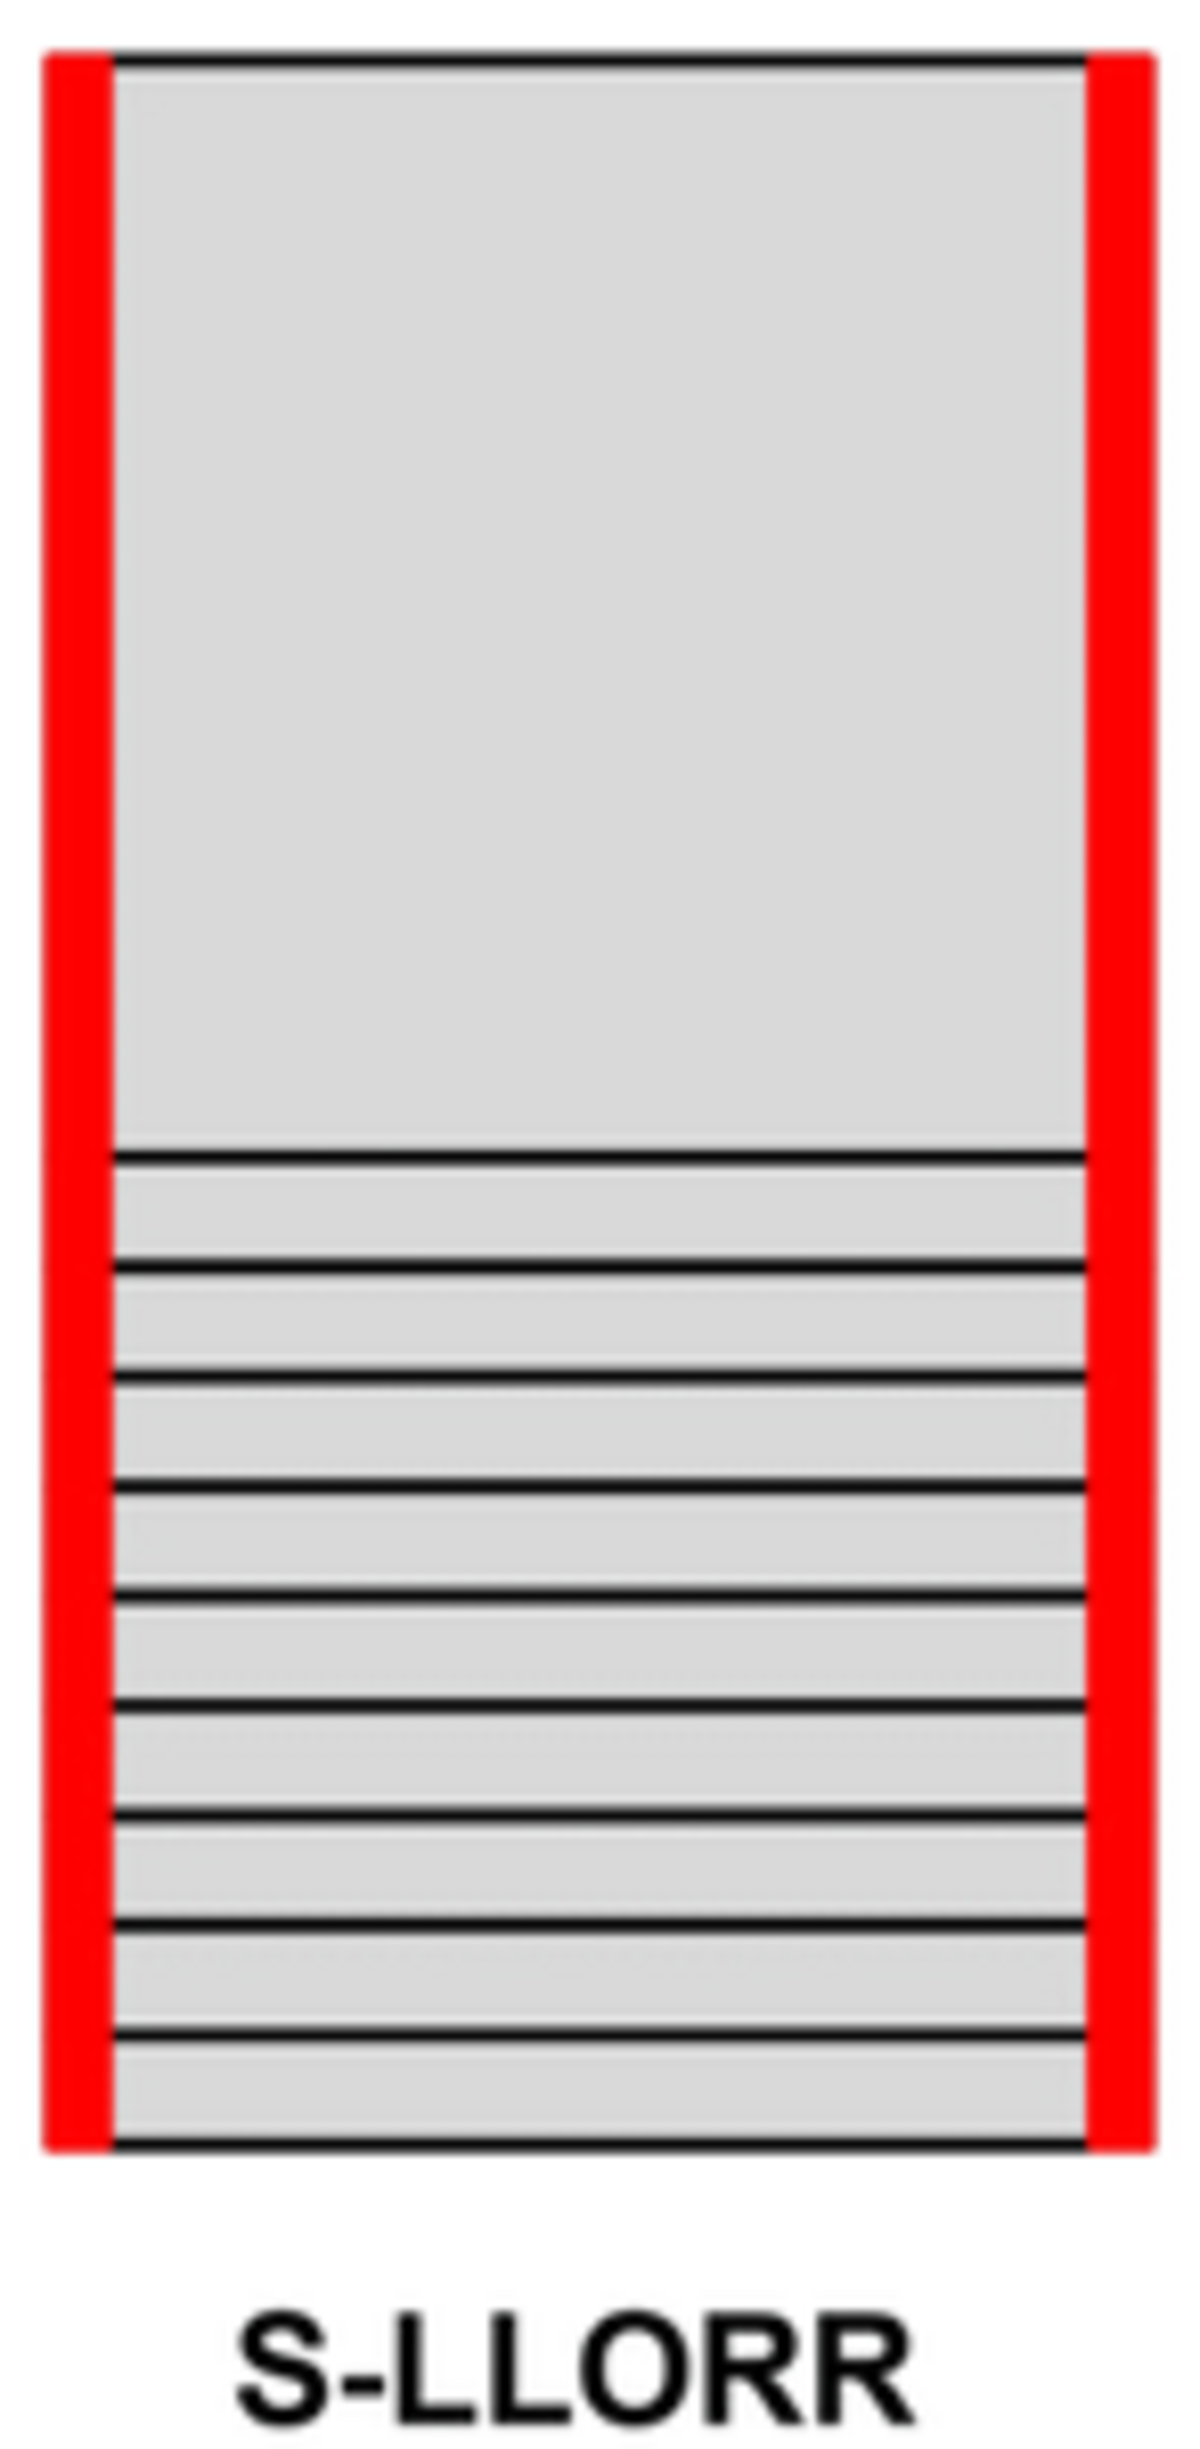
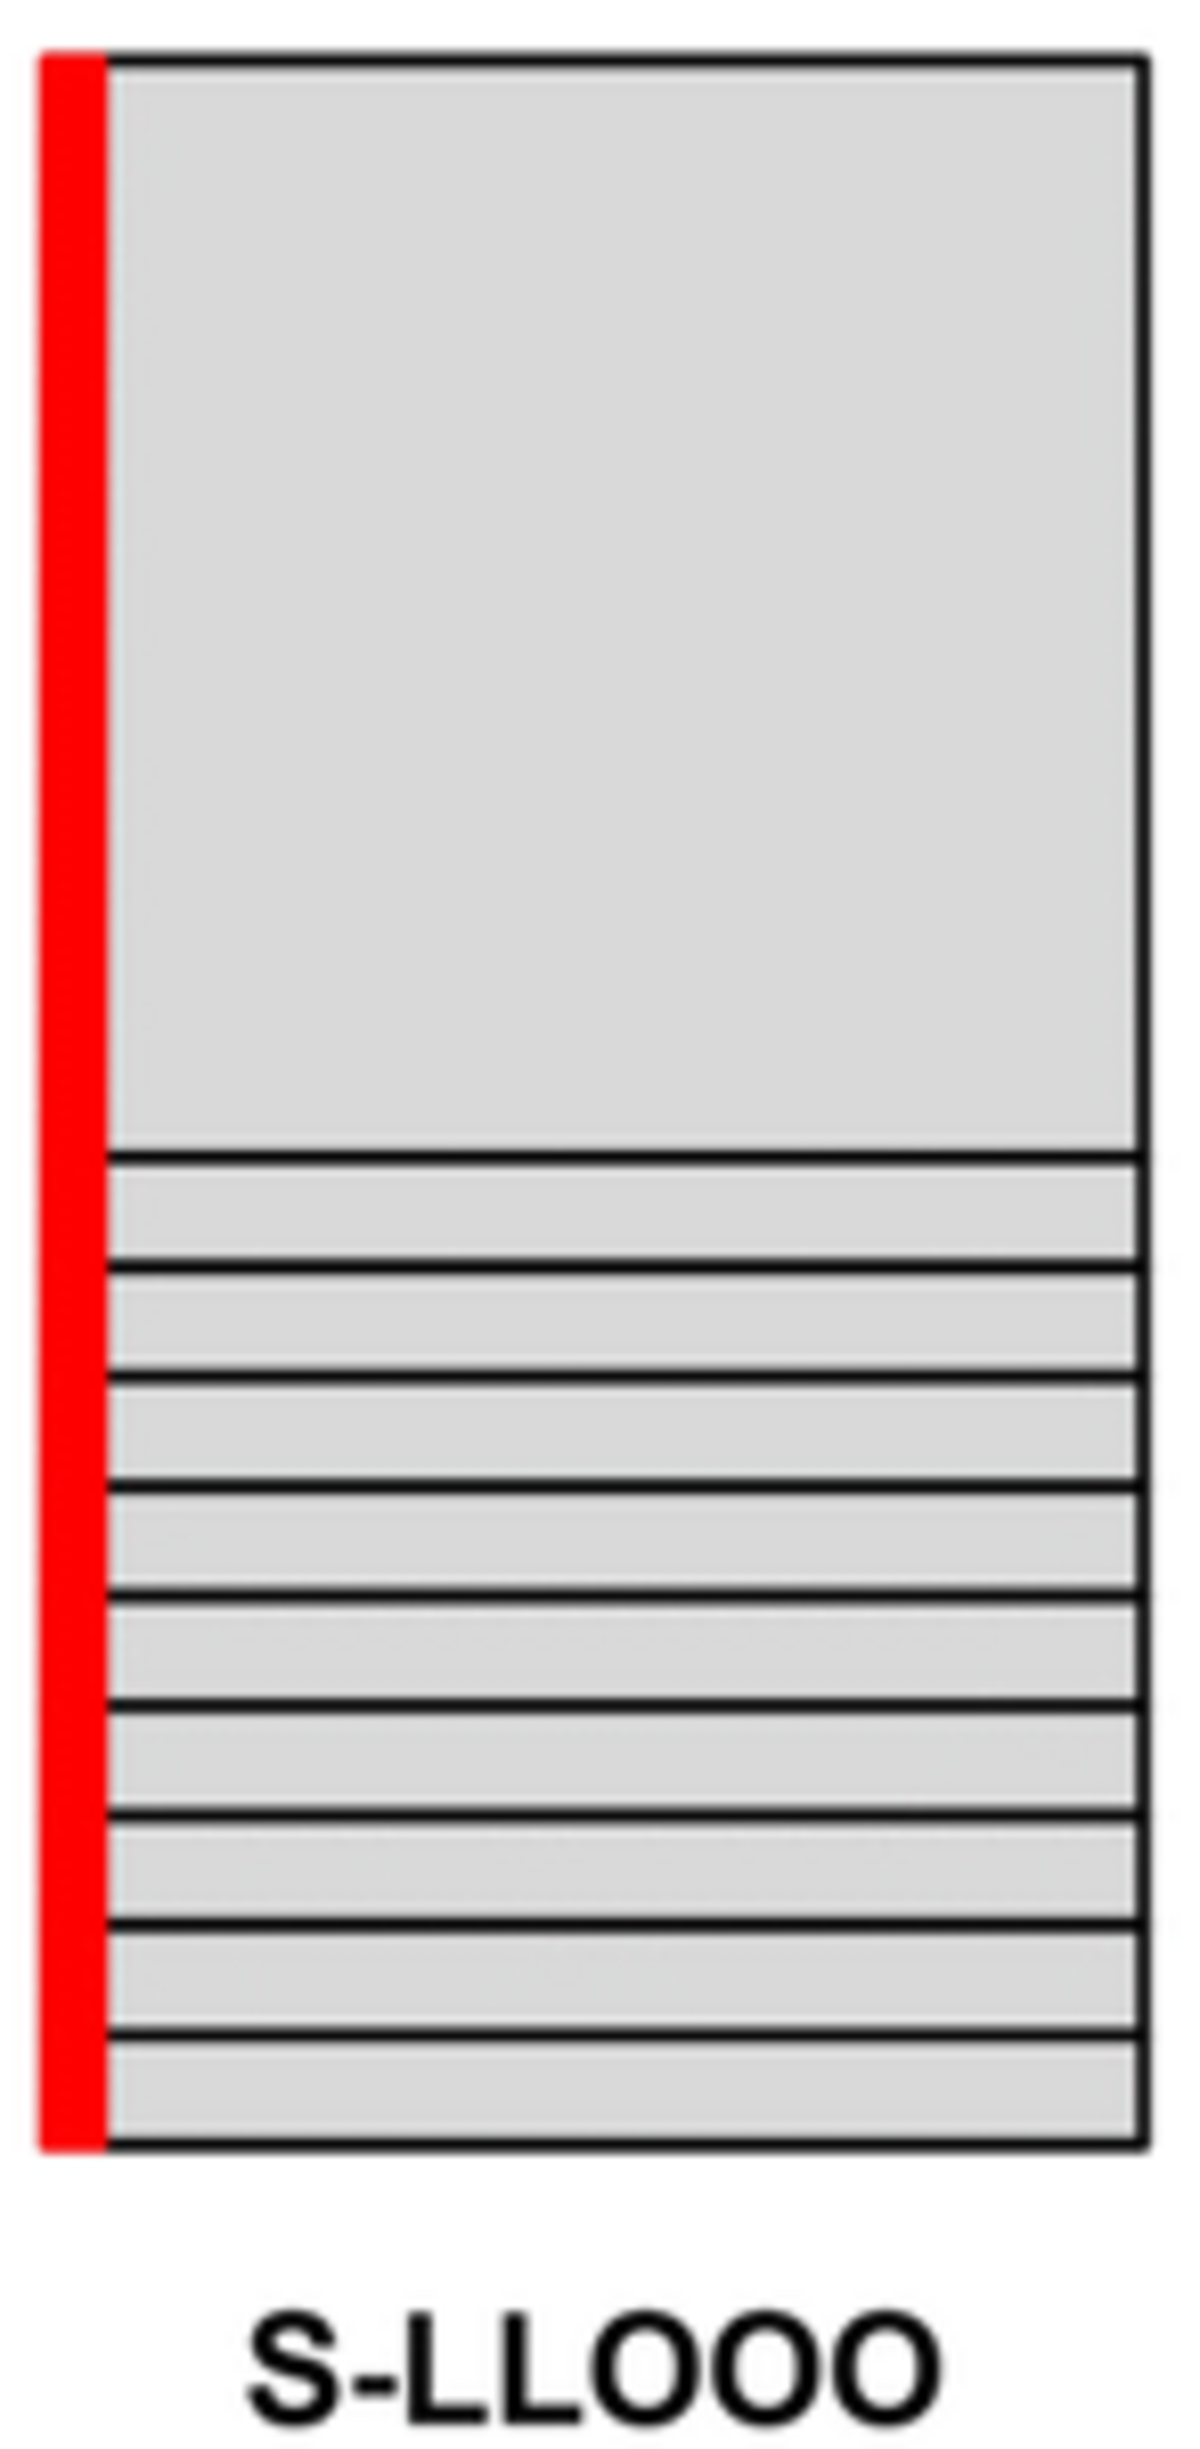
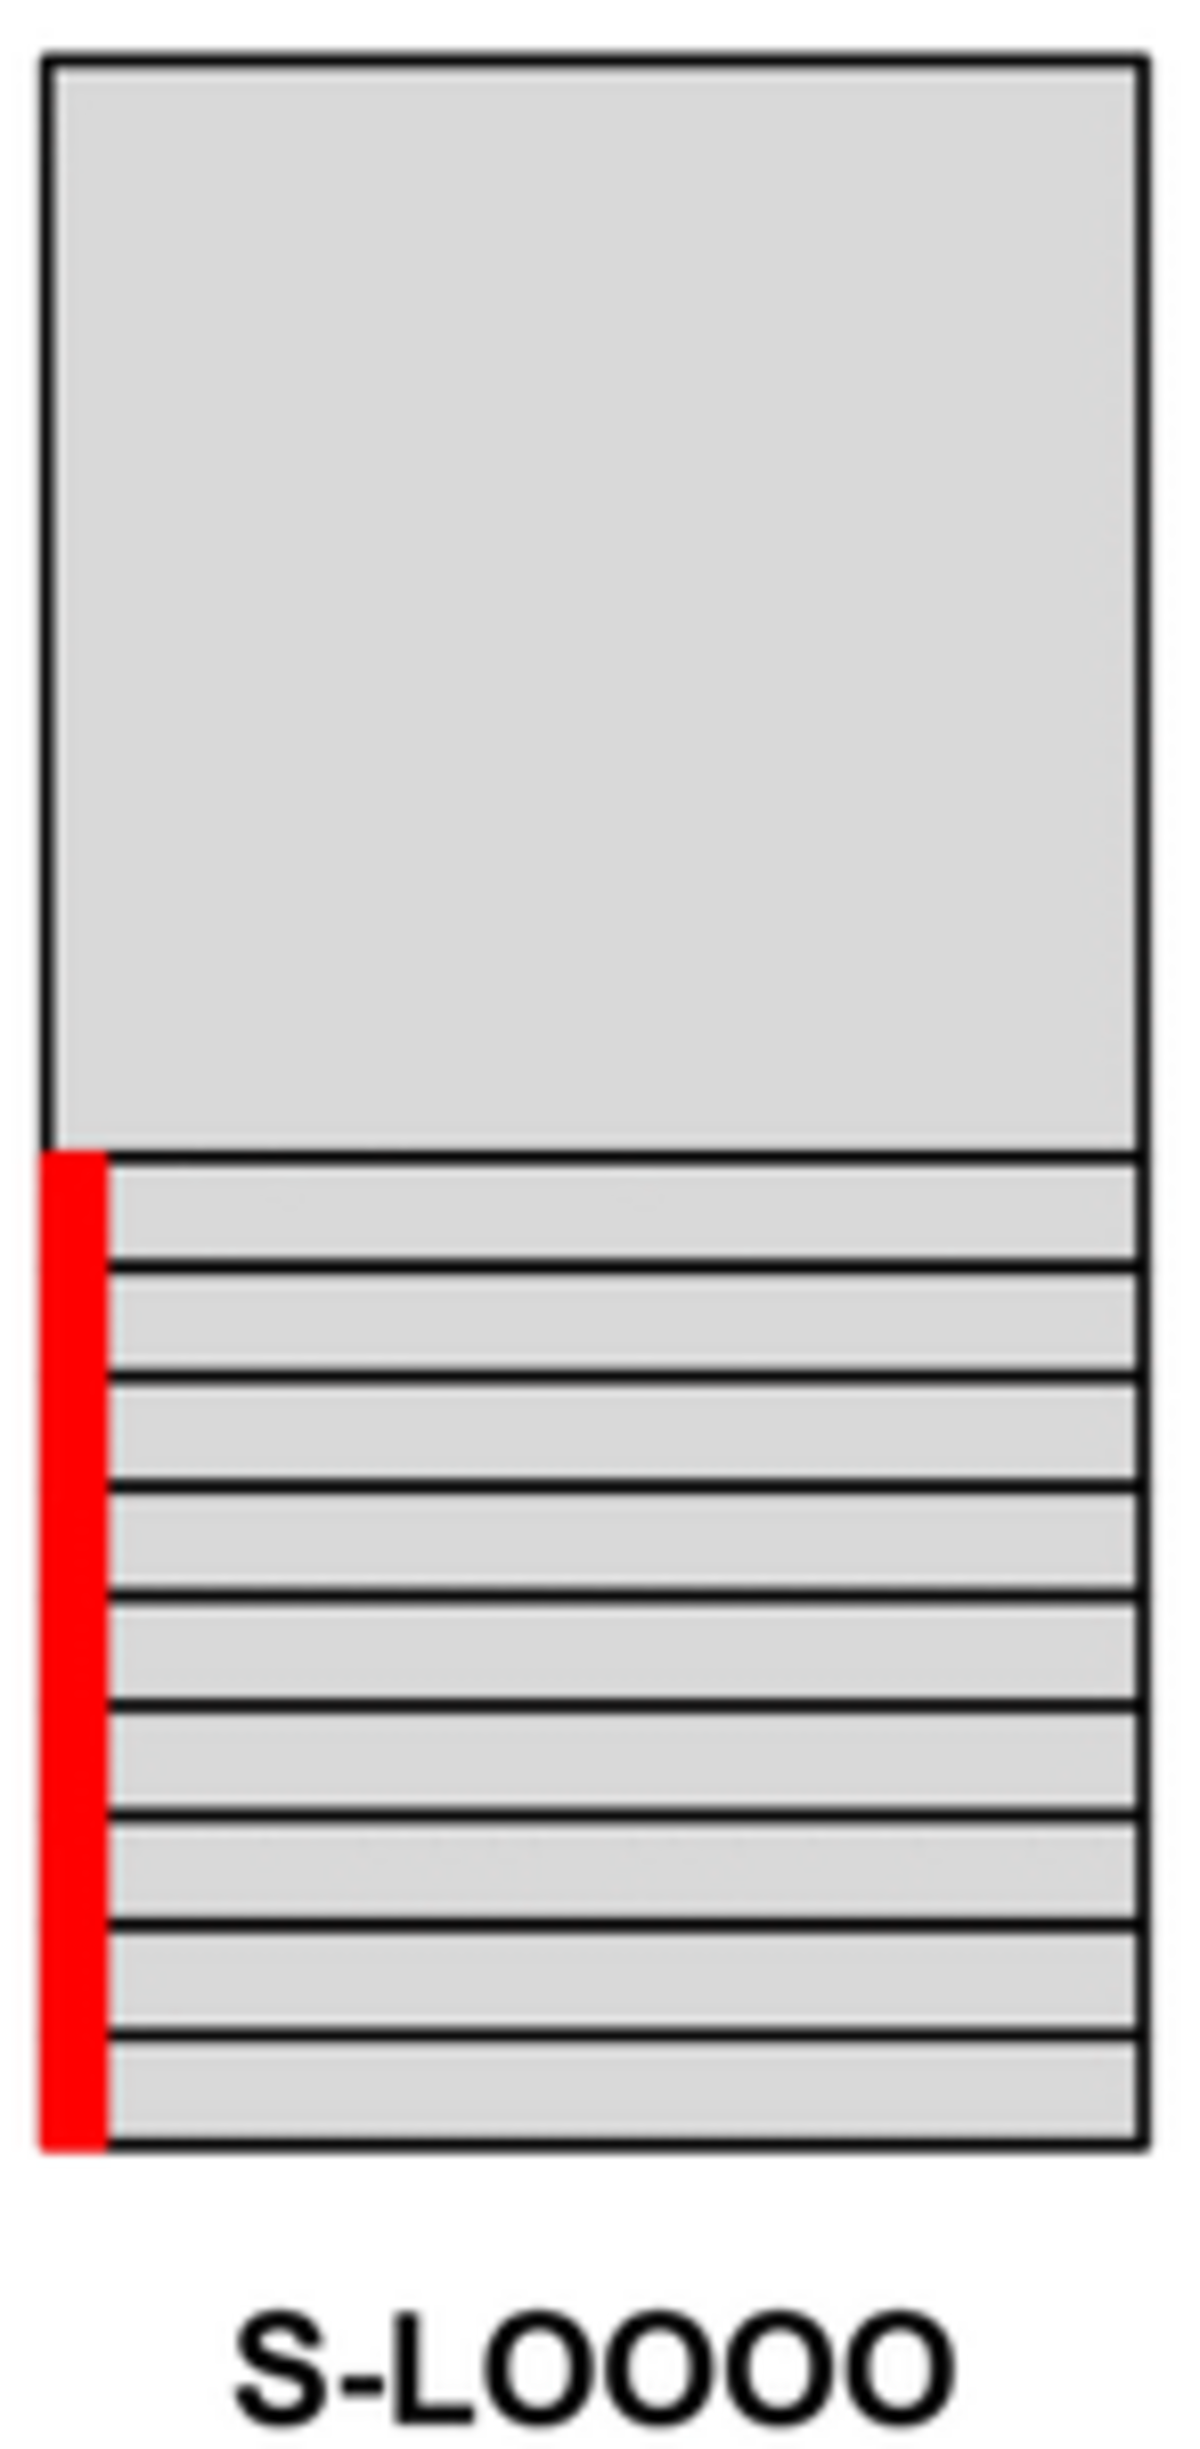
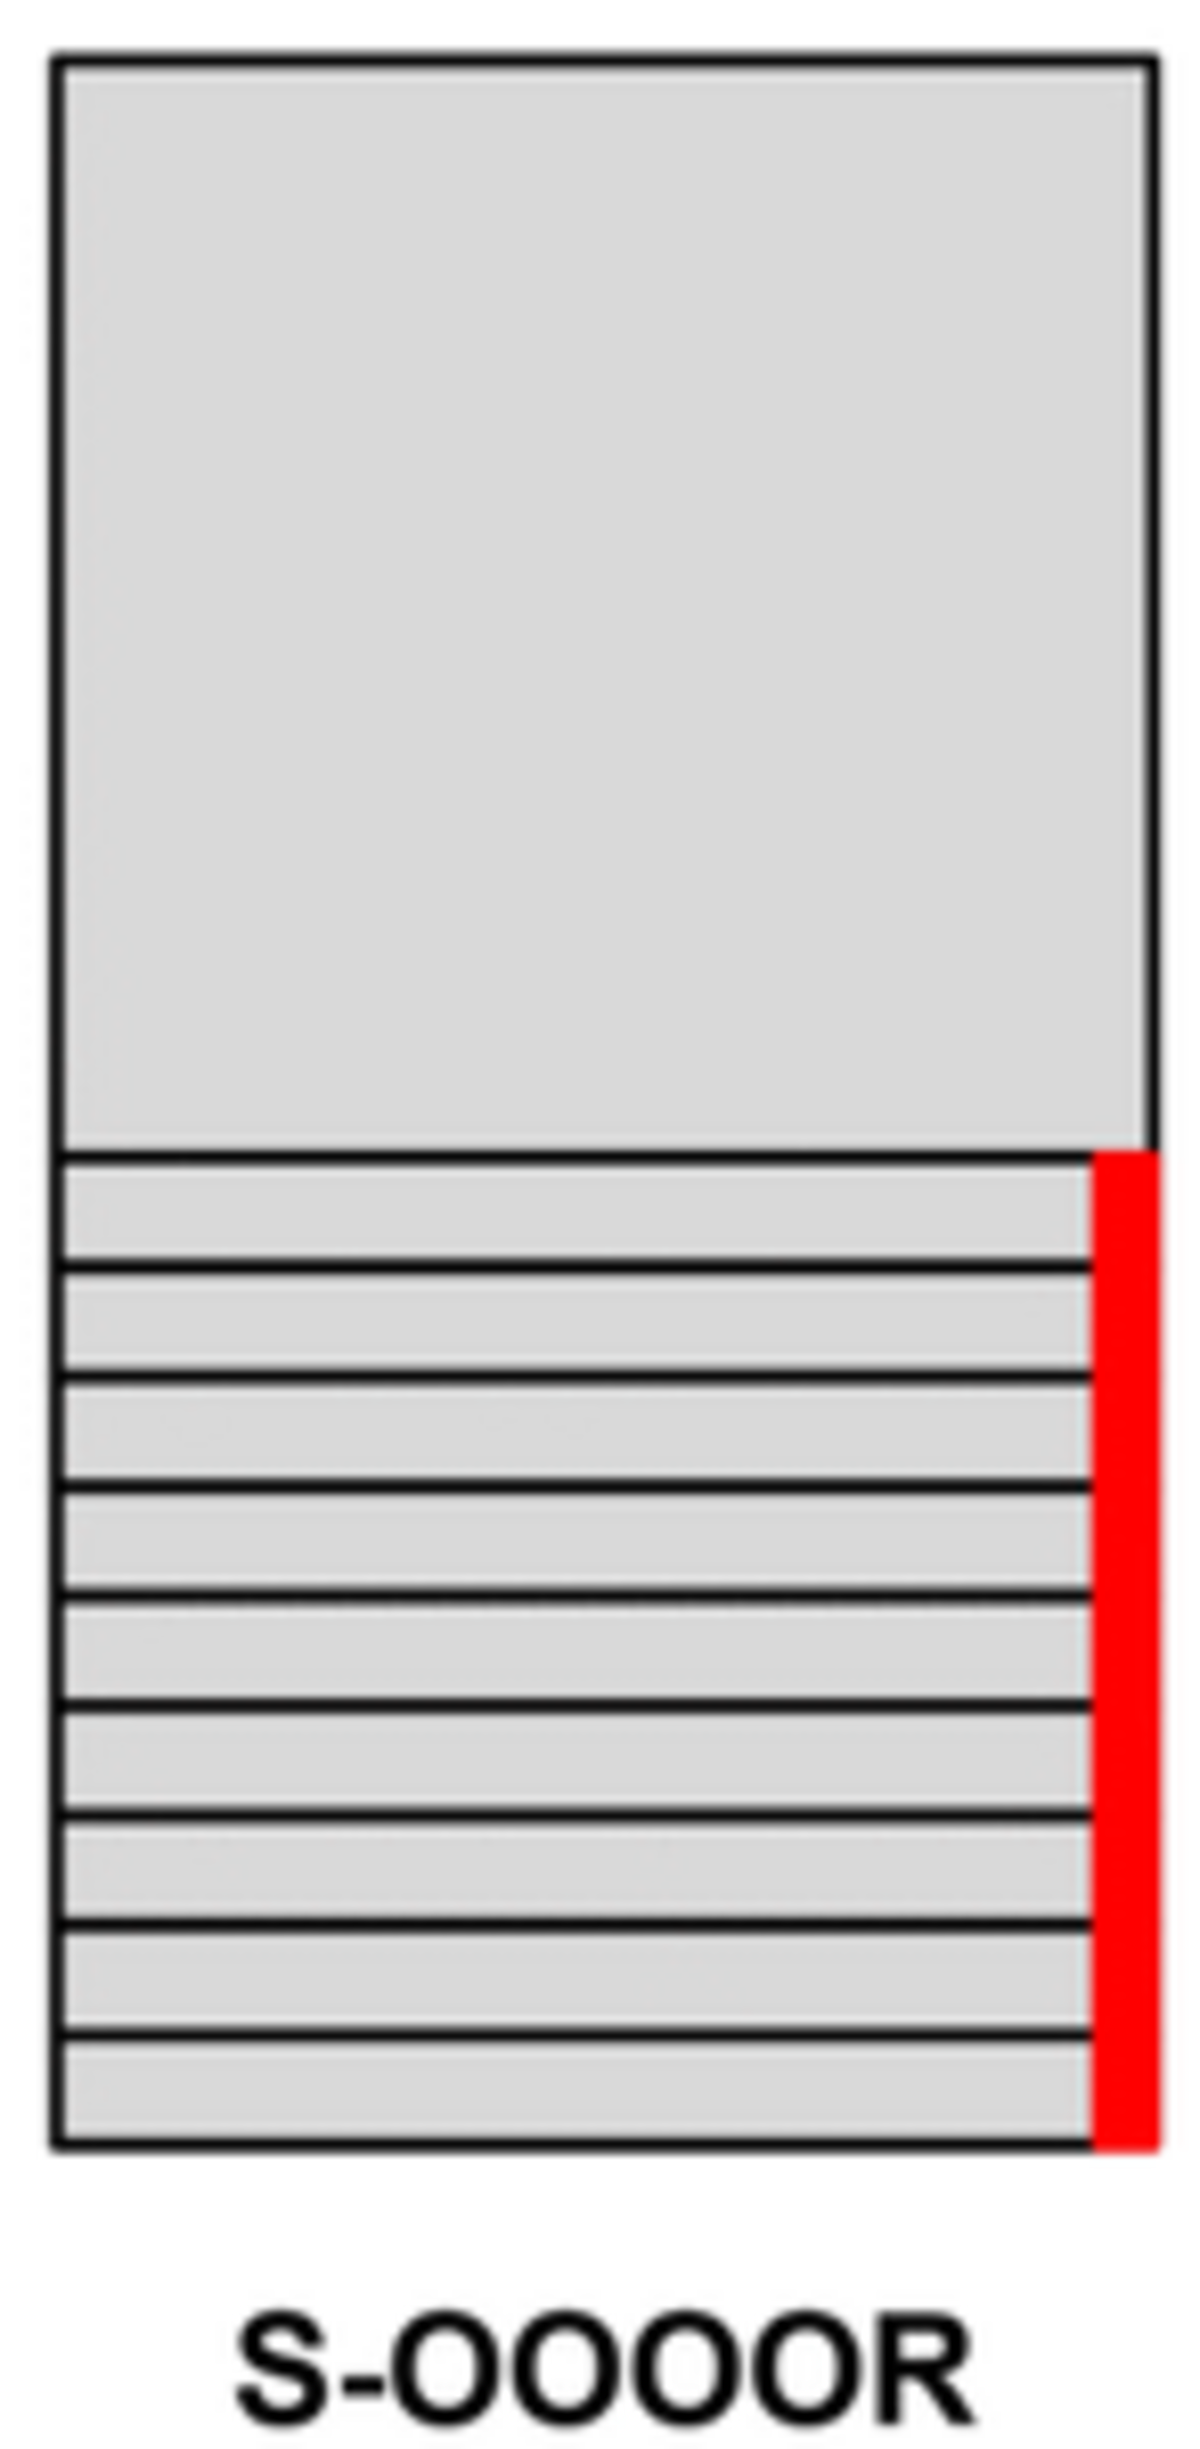
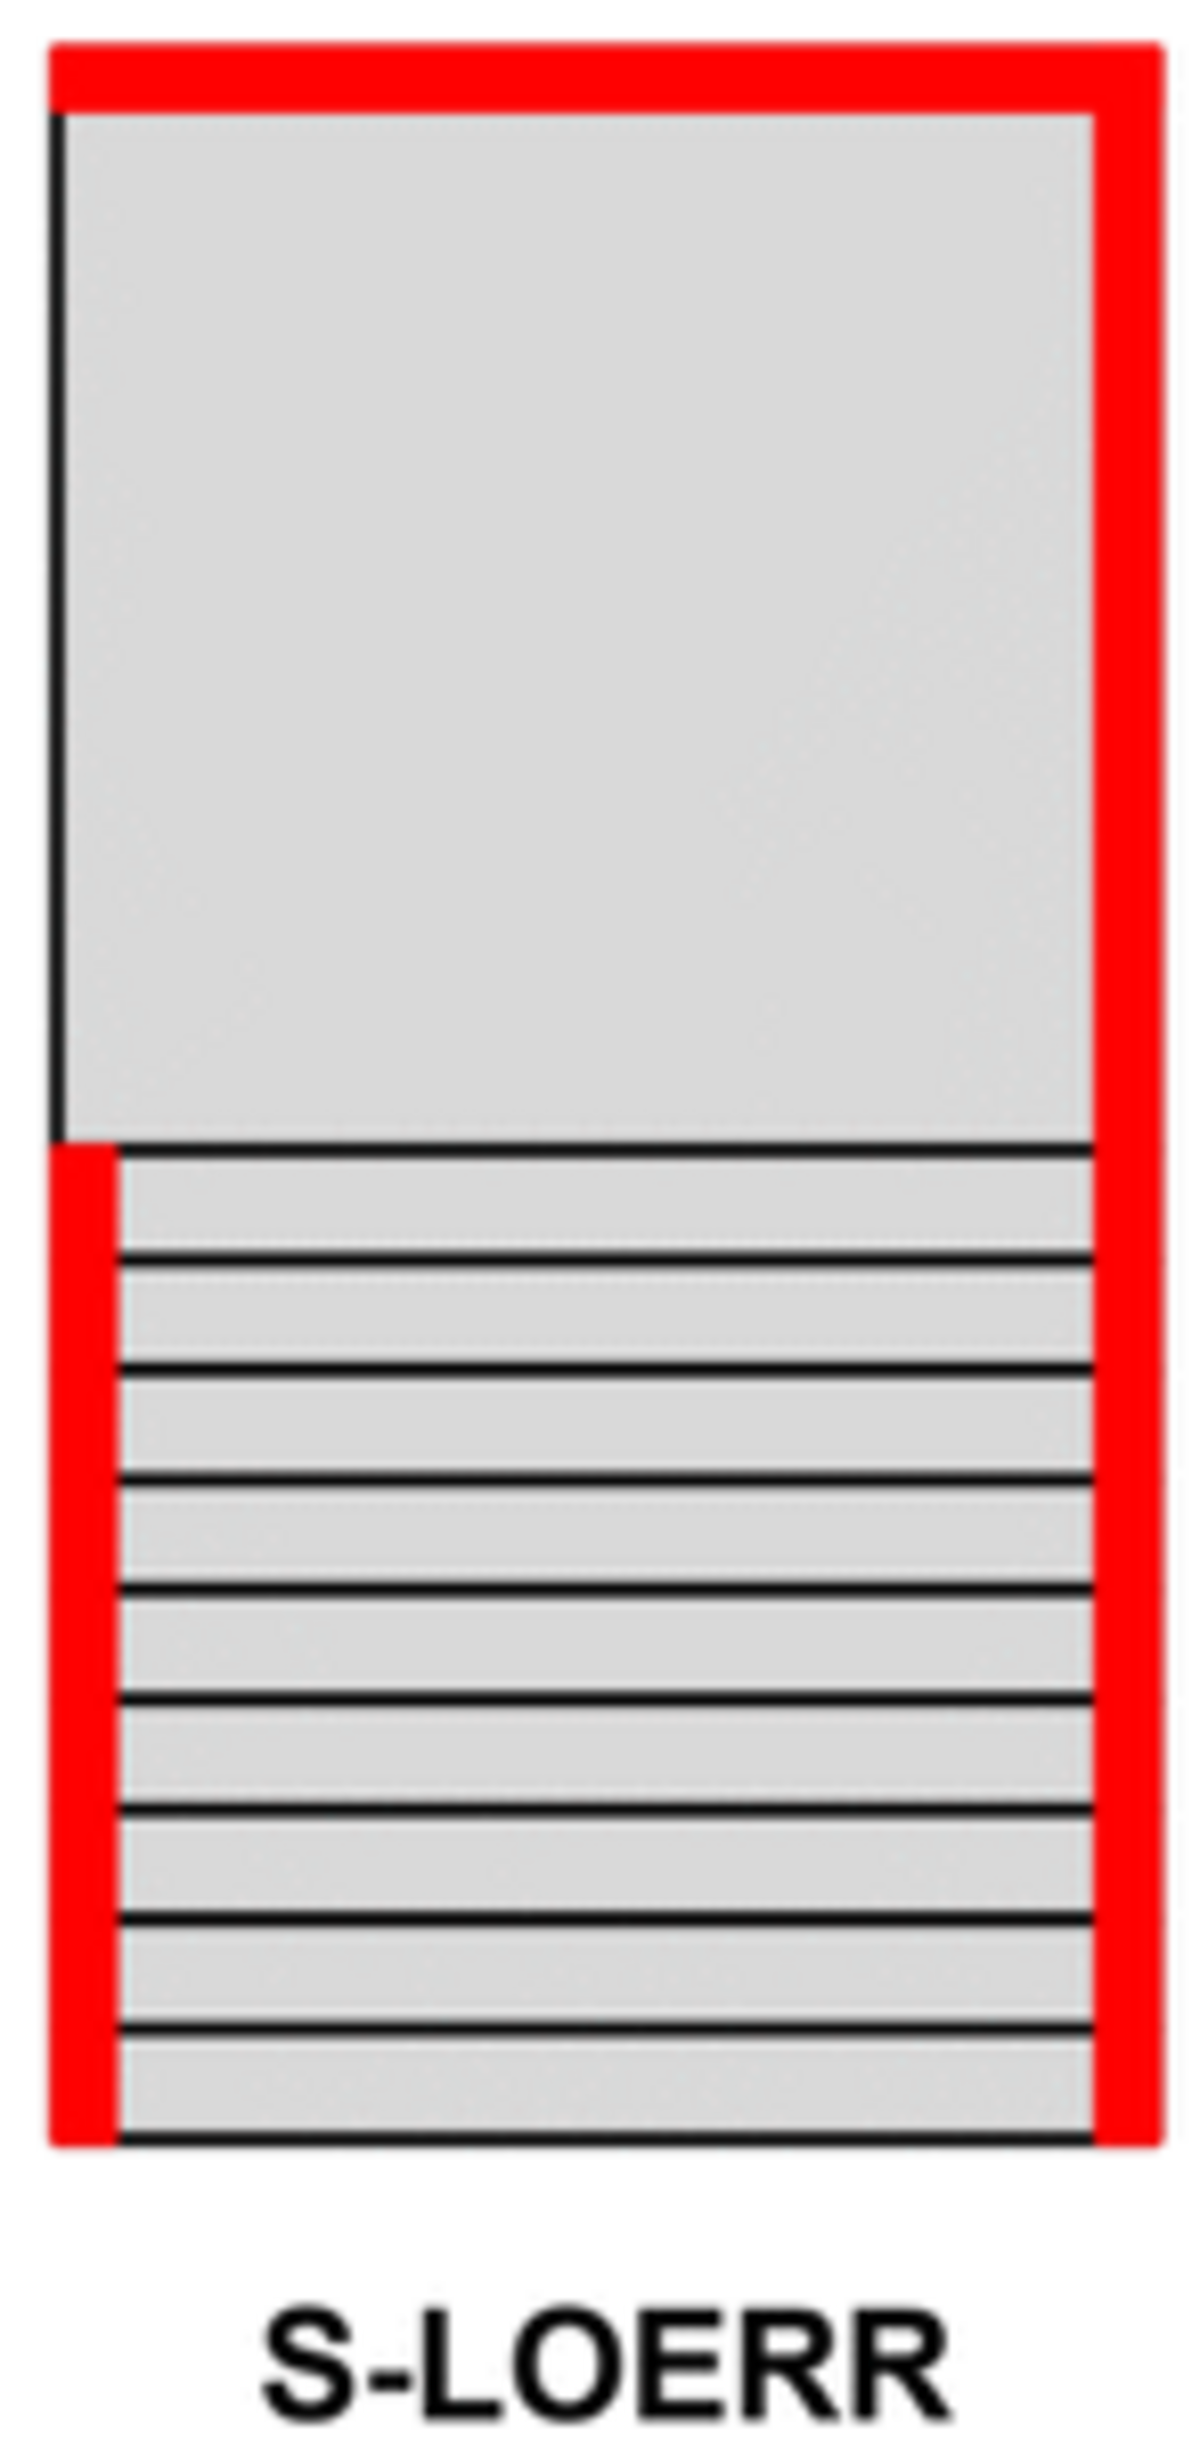
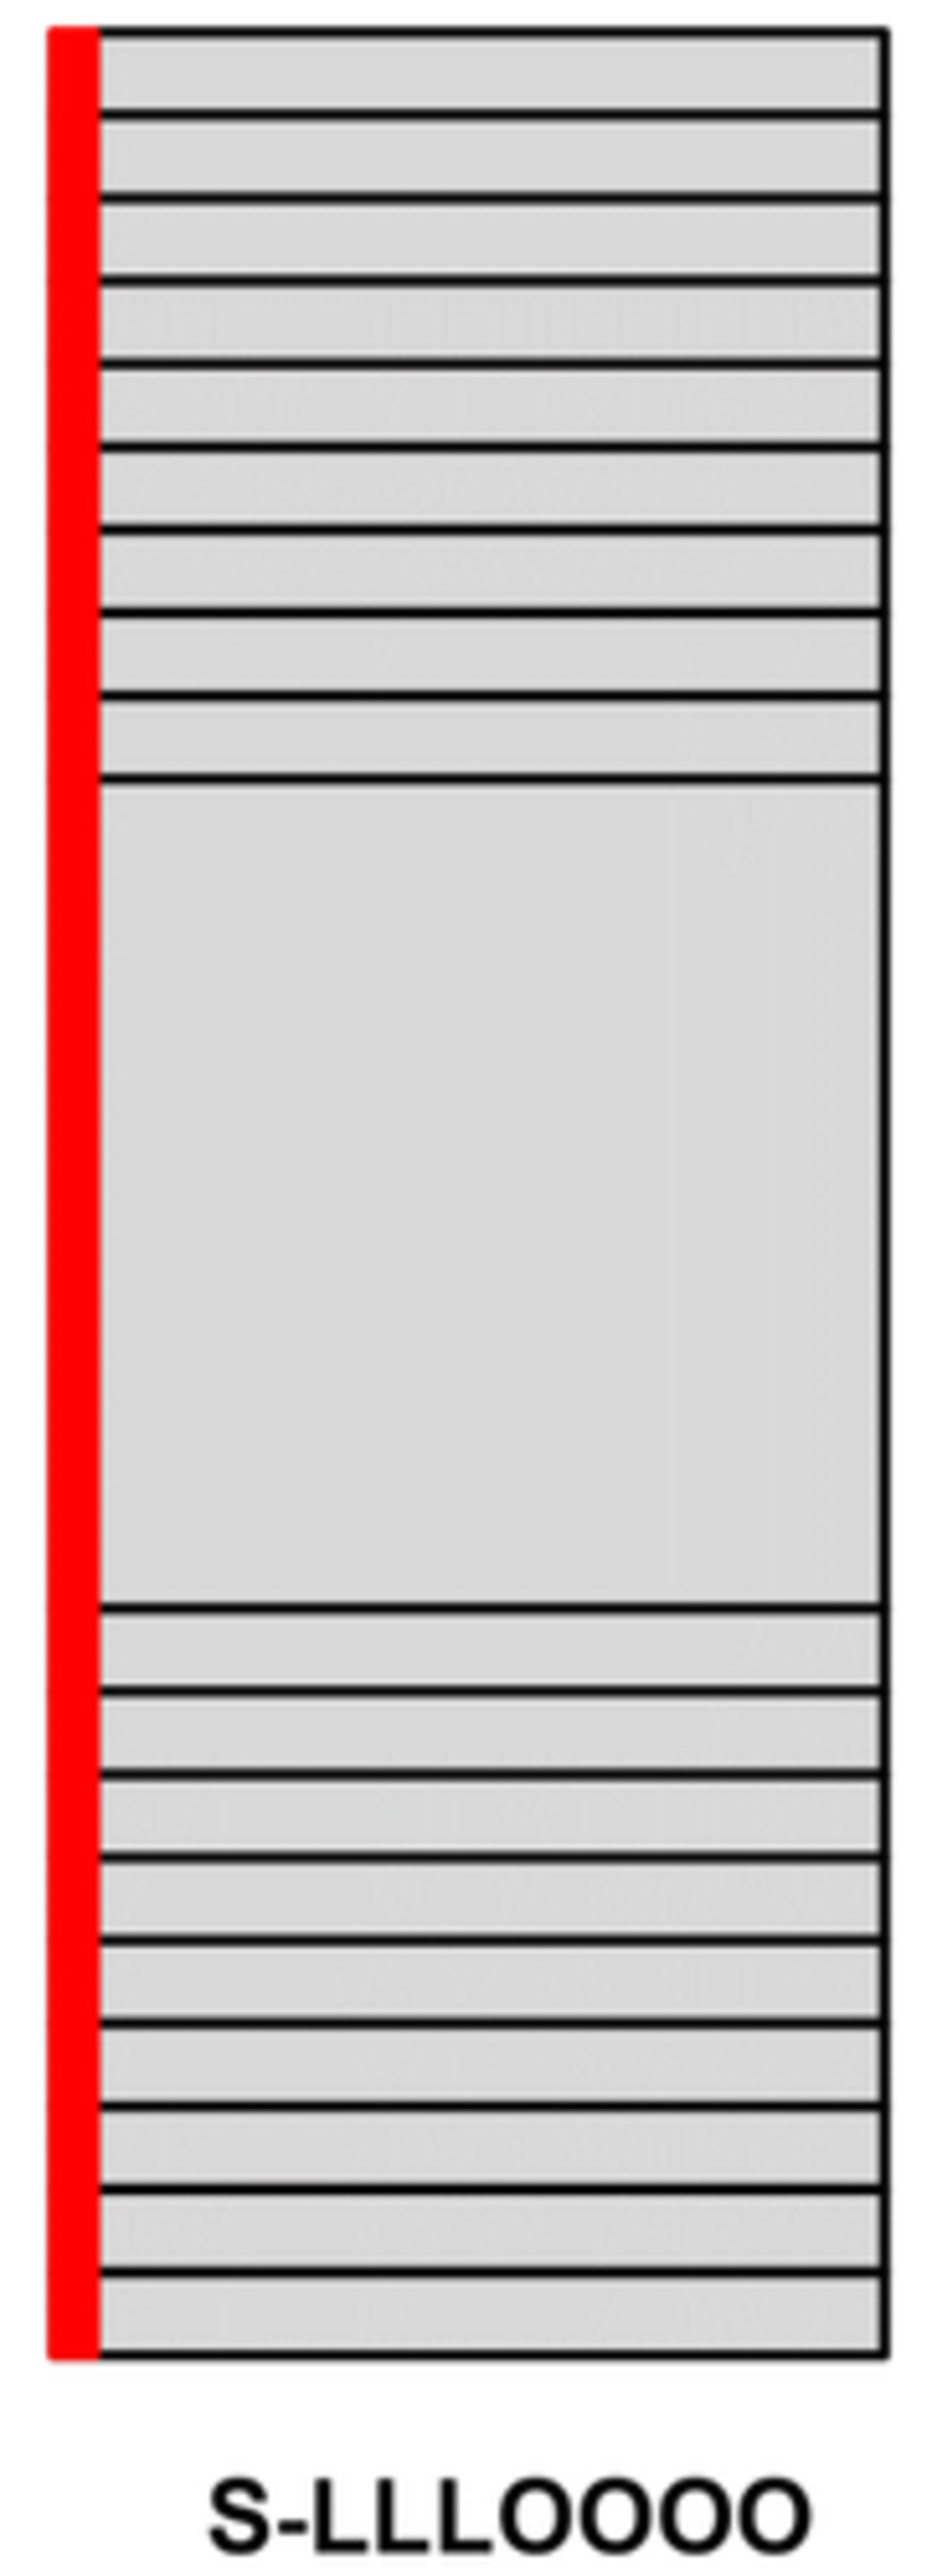
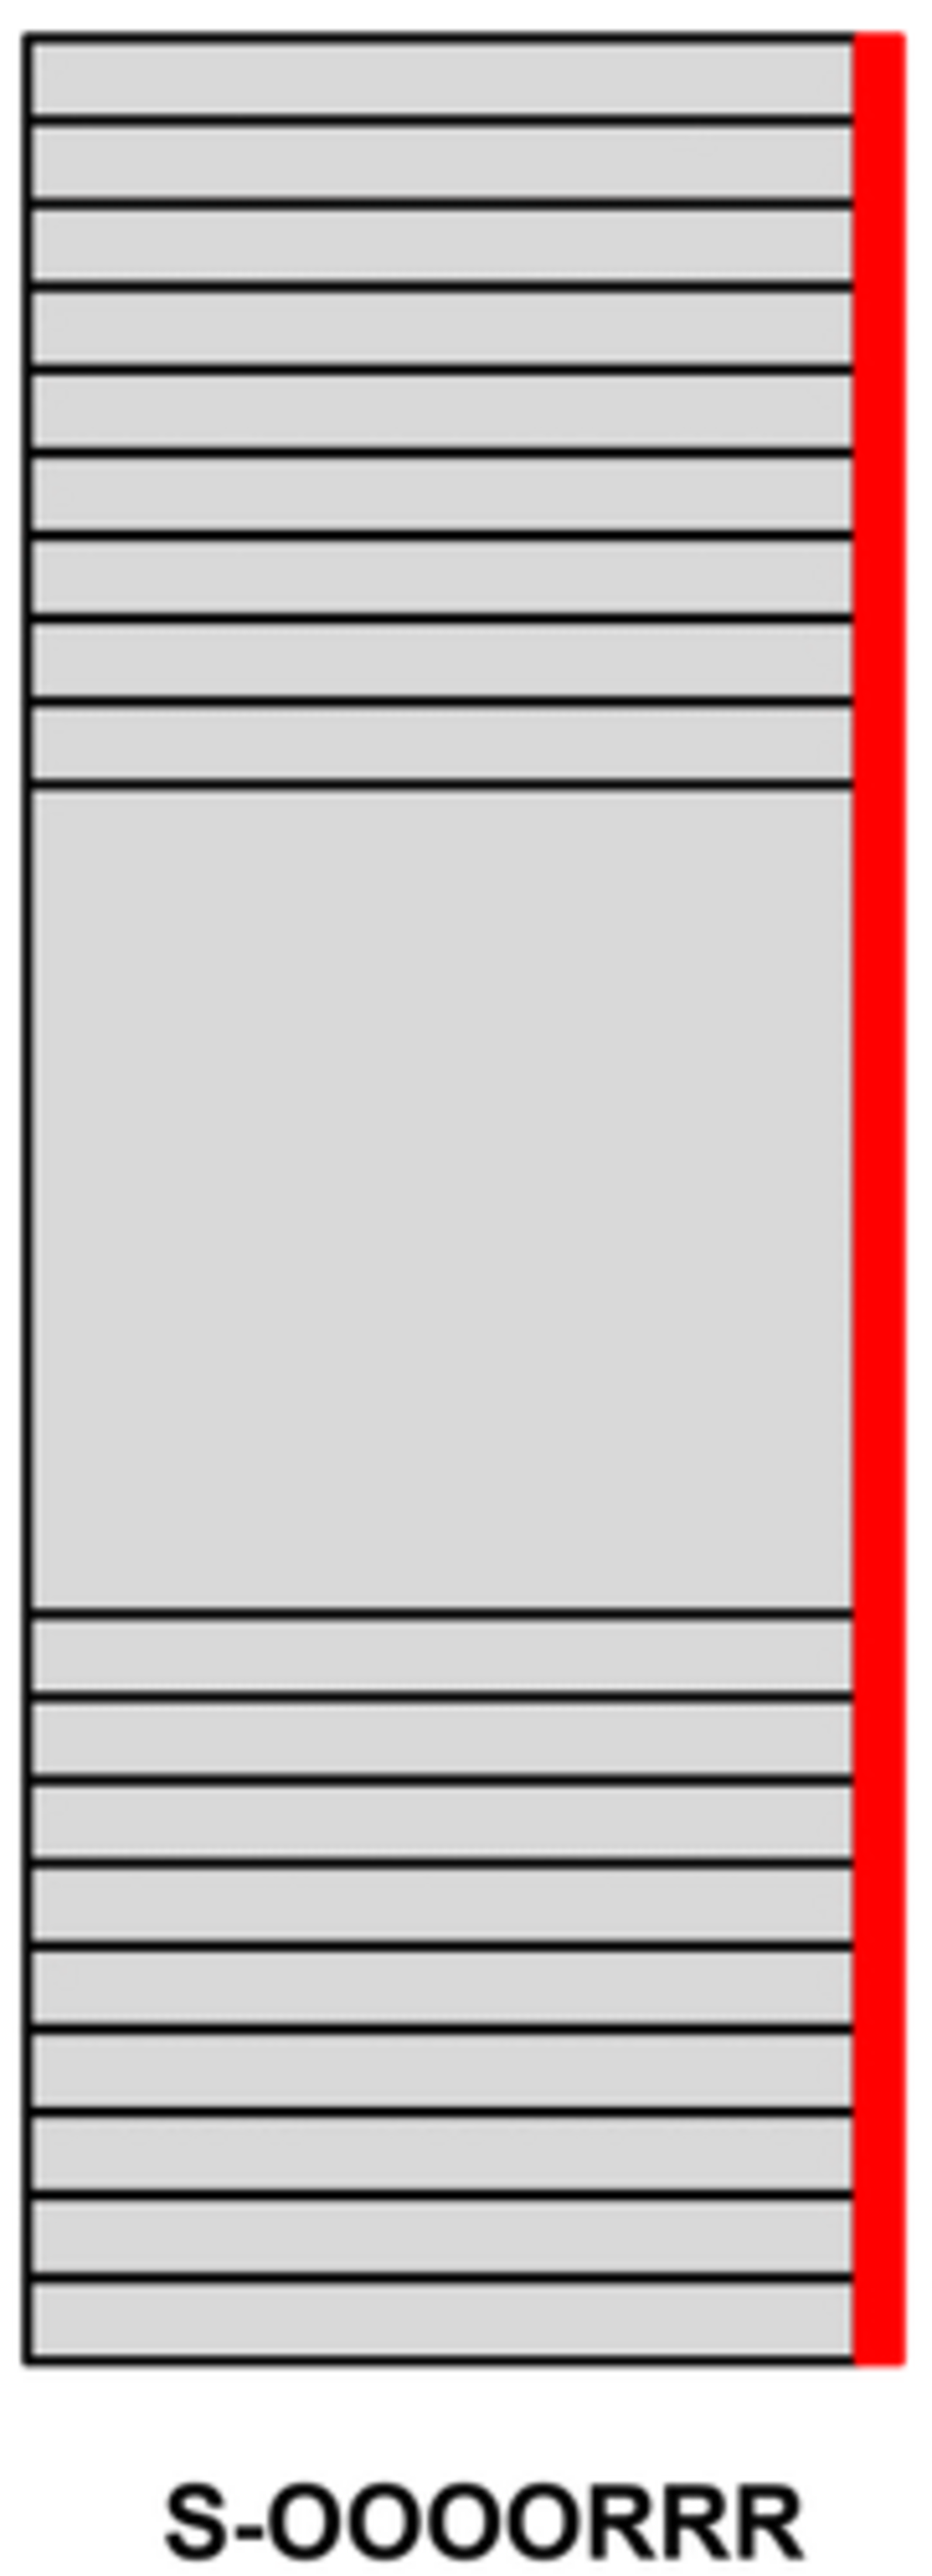
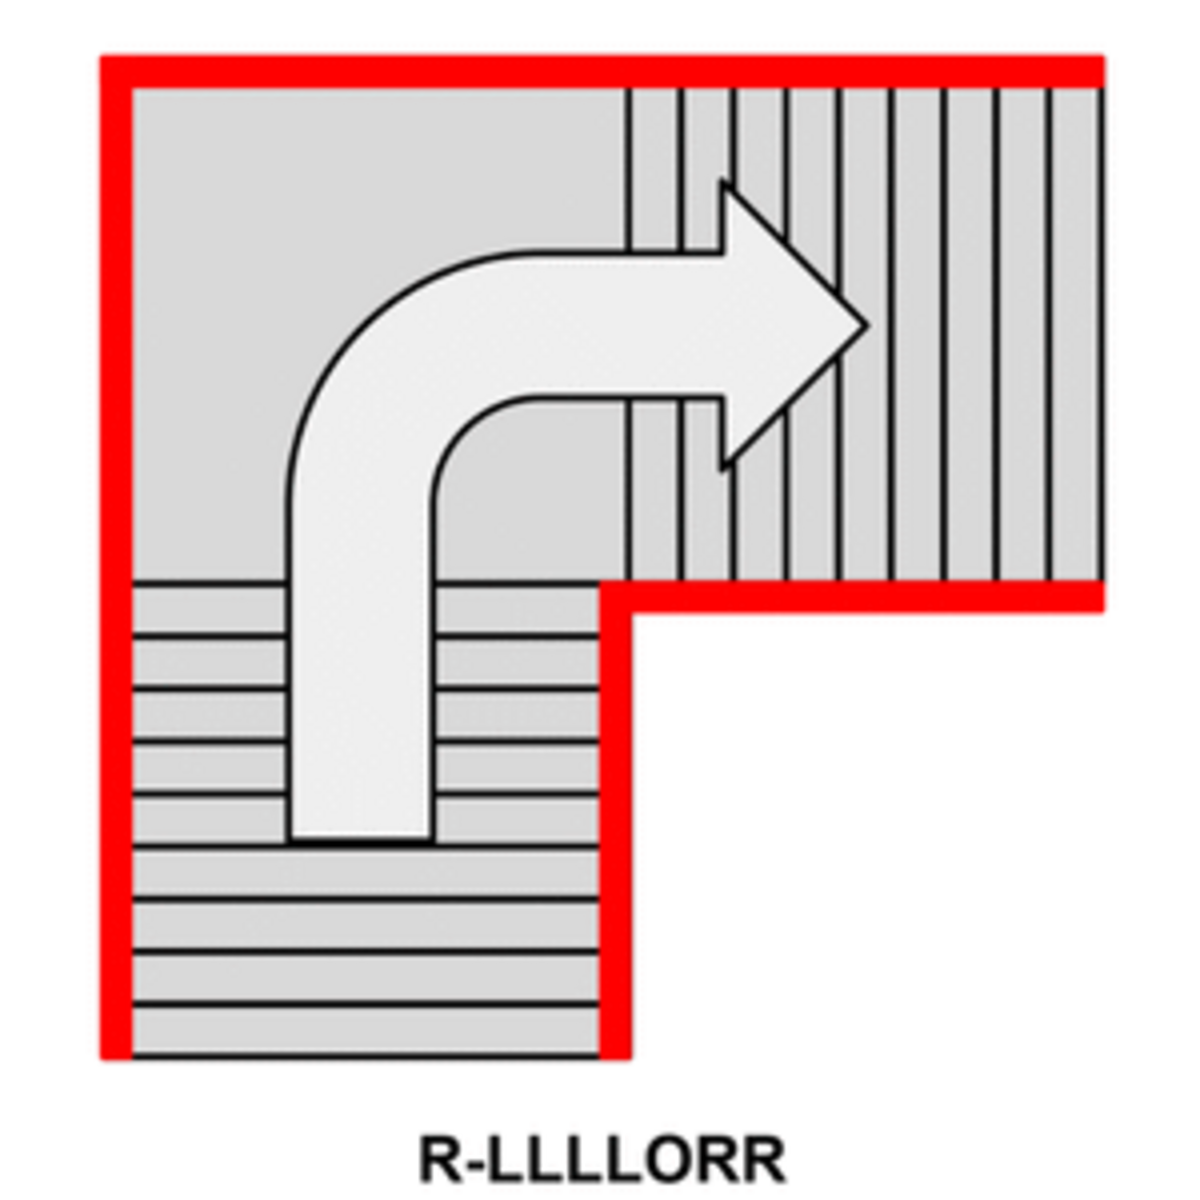
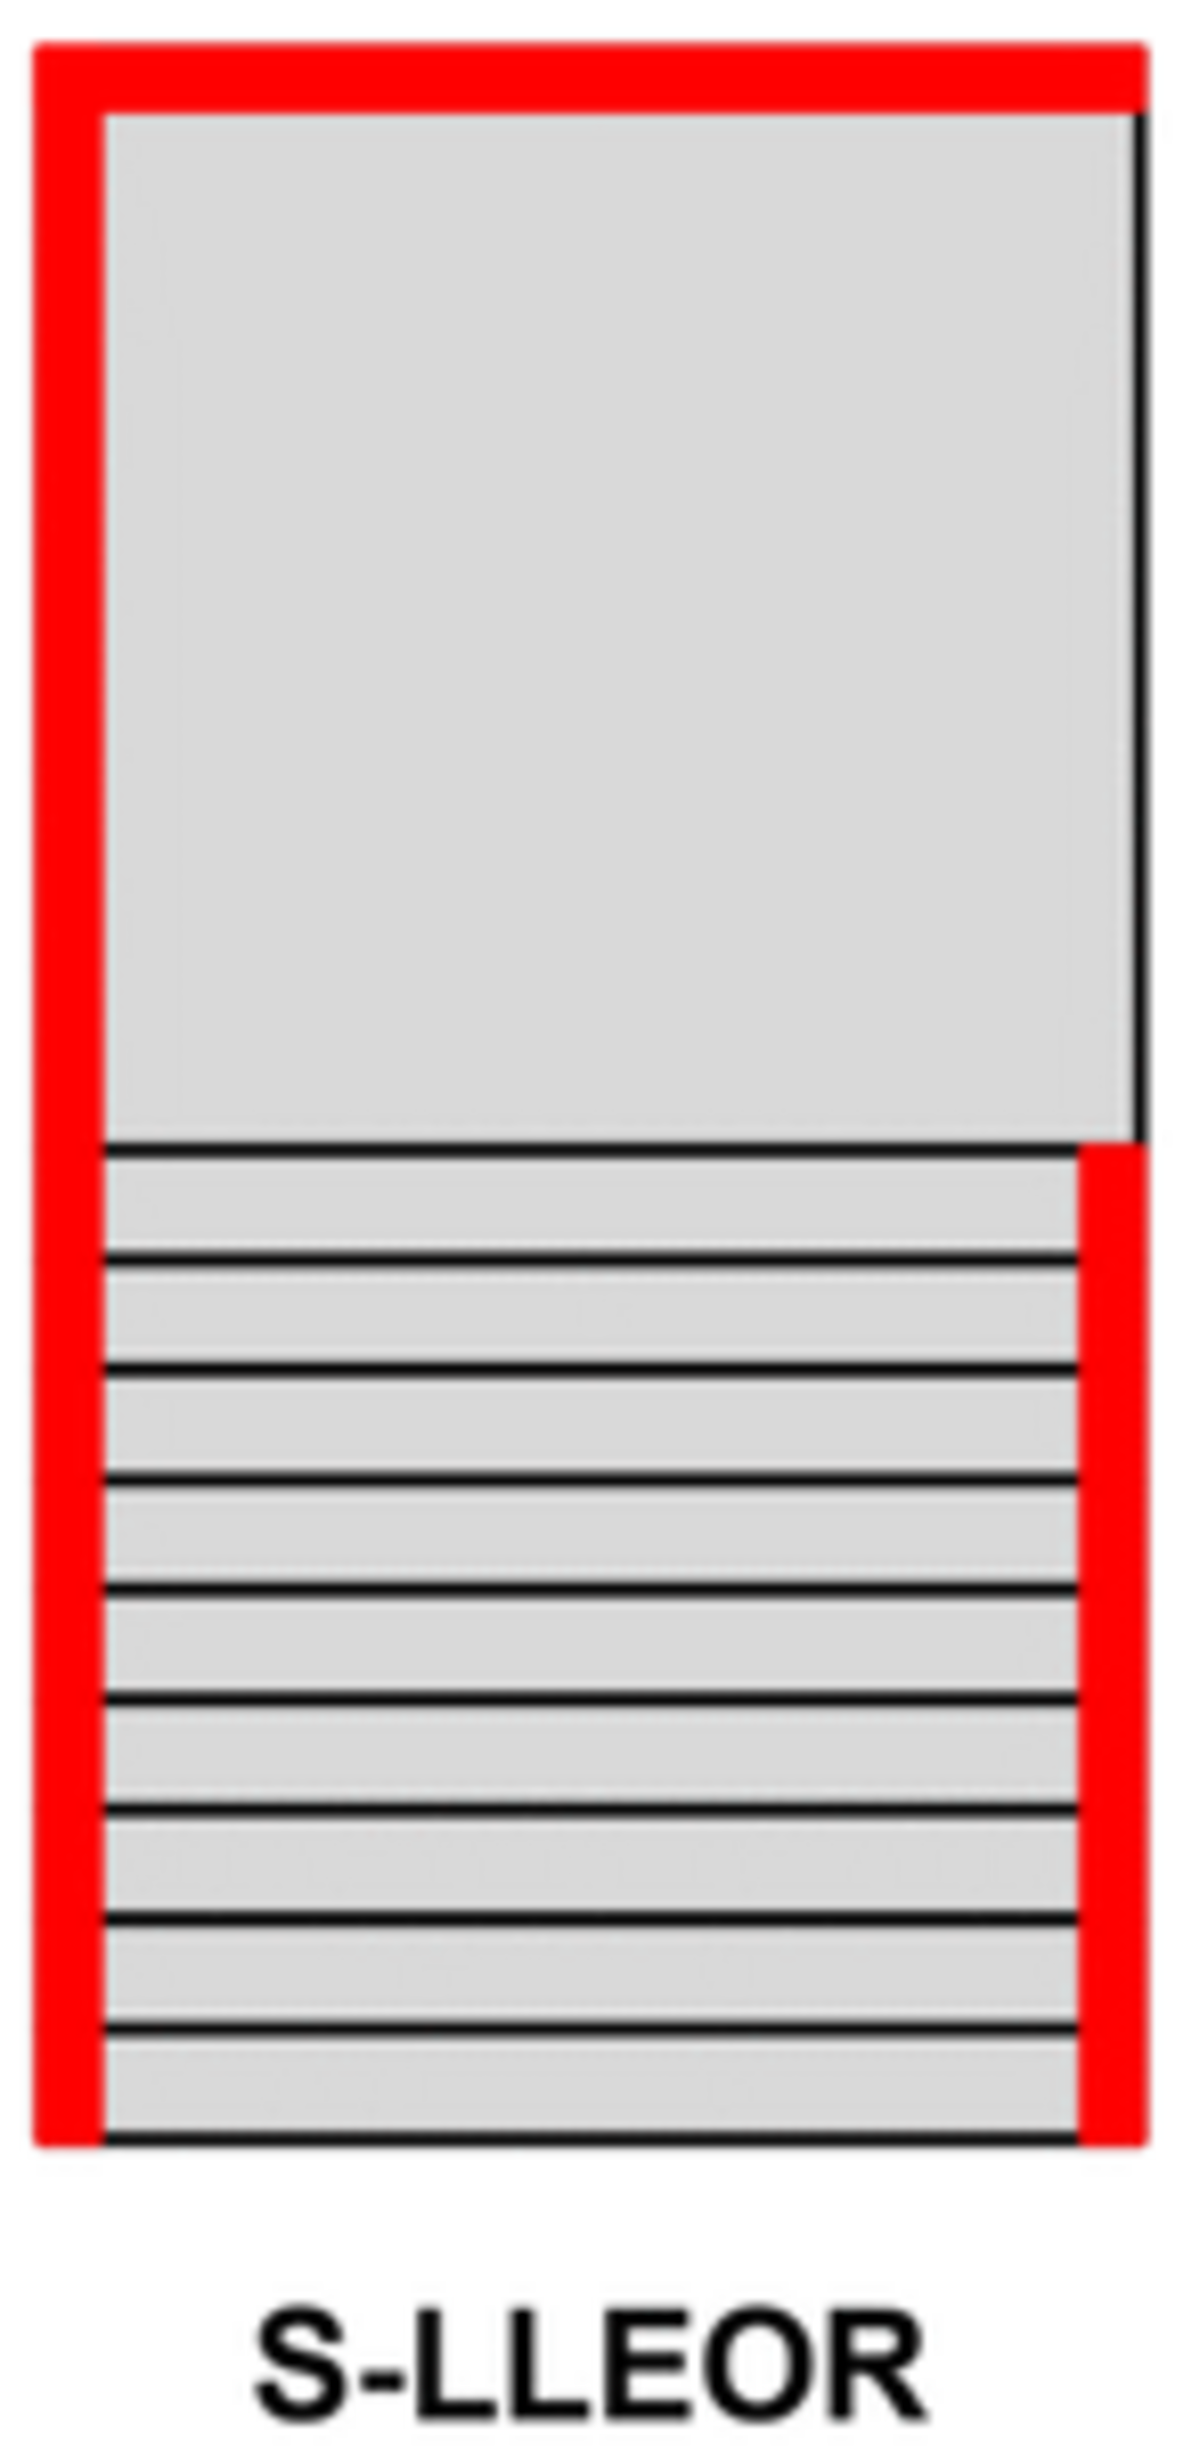
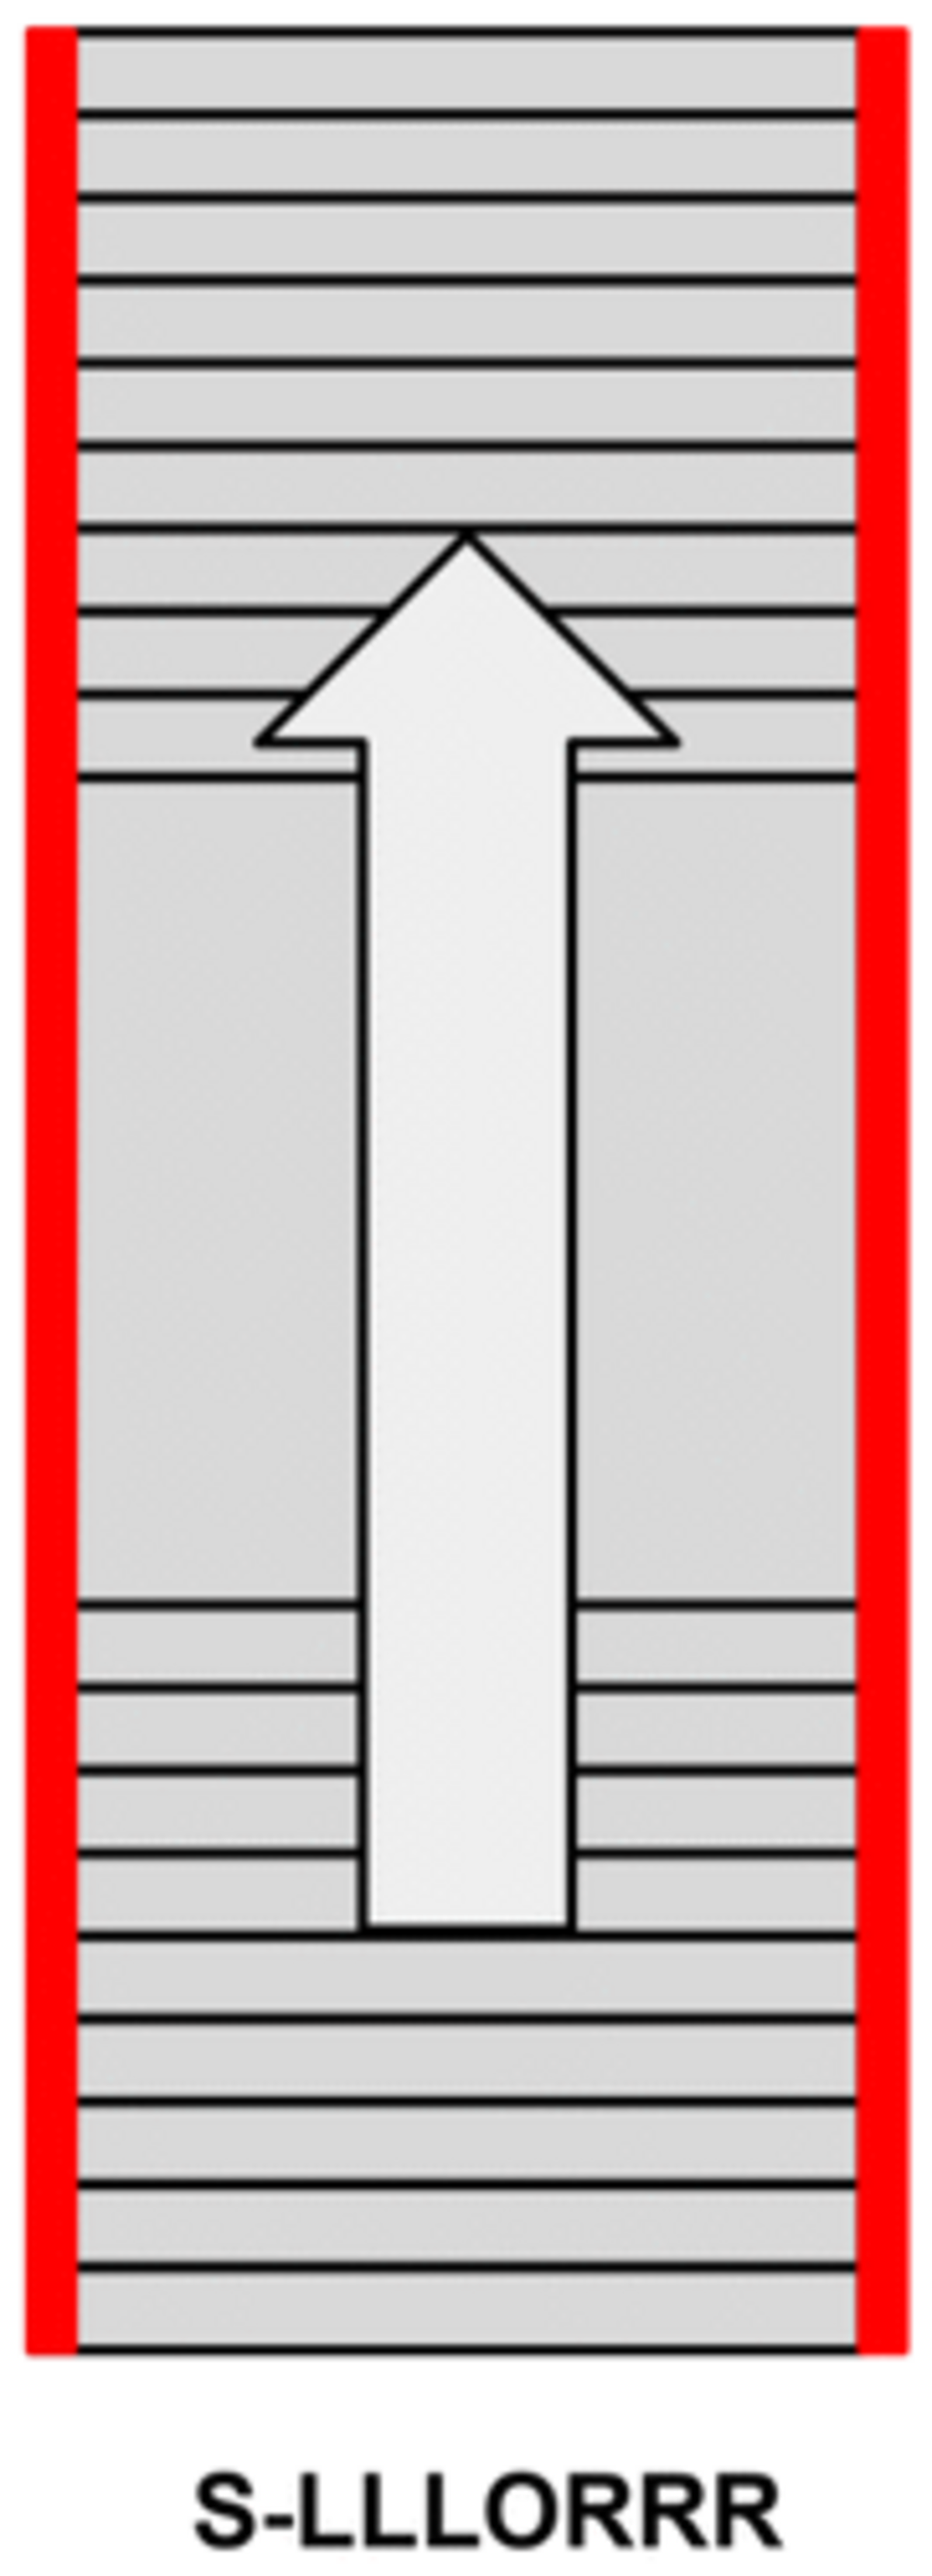
As an example we use the code: S-LLEOR
- S- signifies straight = straight ahead.
That is the model of the deck stairs + banisters: the stairs and the landing go straight ahead, there is no second deck stairs attached that goes either right, either left. - L = Left = the banisters are on the left side of the deck stairs, the landing and possibly the second flight of deck stairs
- E = End = the banisters continu up to the end of the landing
- O = Open: here are no banisters/balustrades, might come in handy to be able to exit somewhere ;-)
- R = Right =the banisters are on the right side of the deck stairs, the landing and possibly the second flight of deck stairs
Are you still with me??
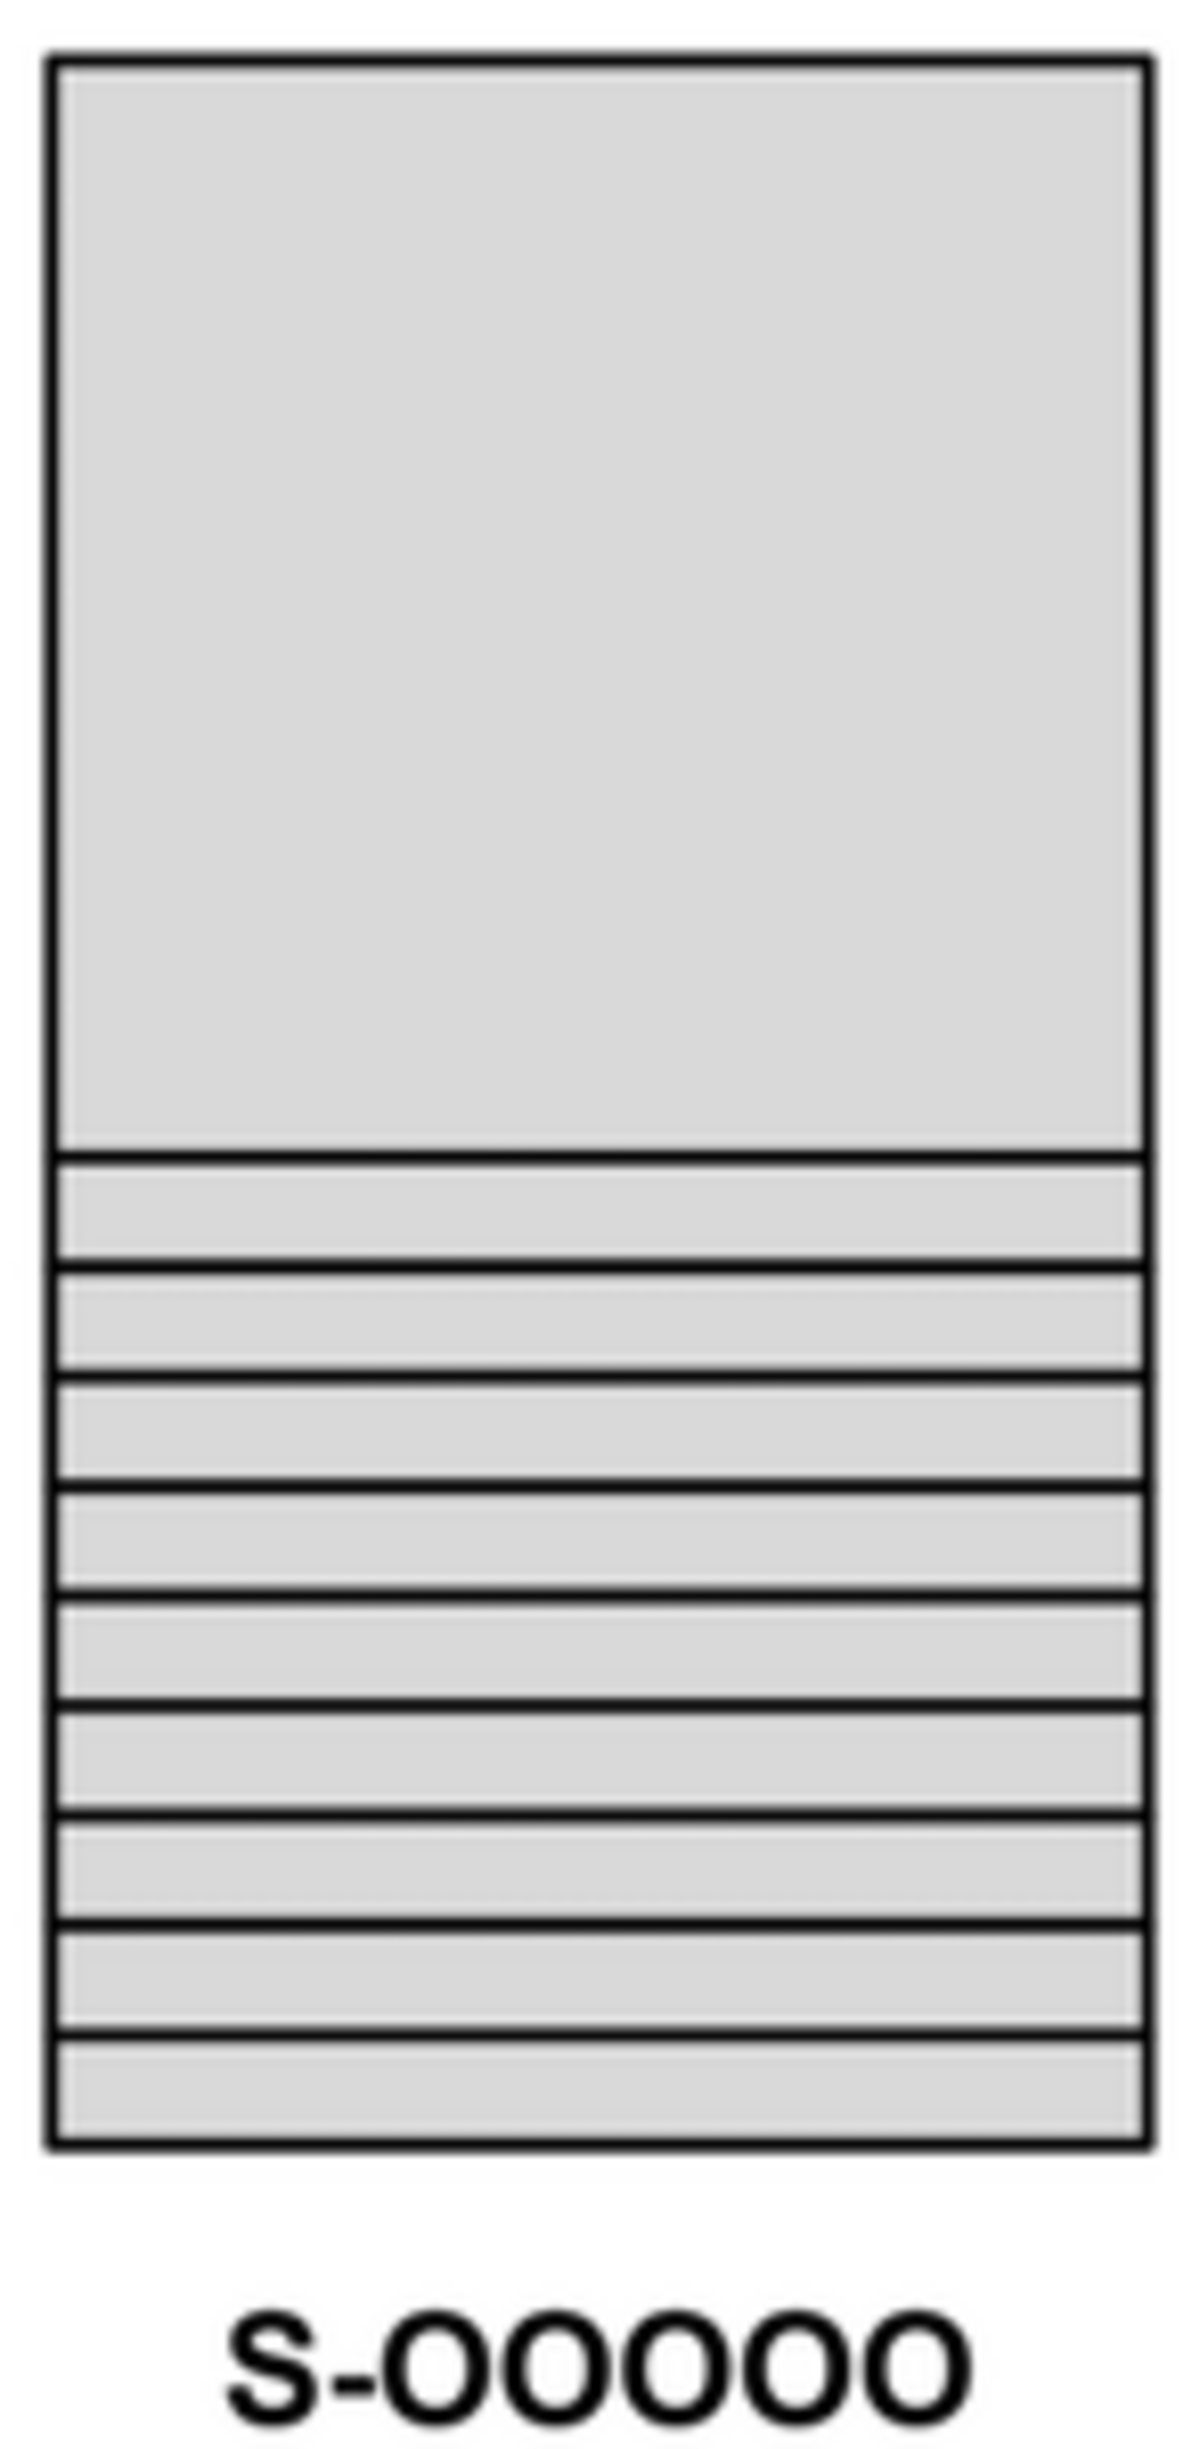
Balustrade choices up to a height of 10 steps
Here below you can see the ten possibilities for banisters and balustrades for your deck stairs with landing with a height up to ten steps.
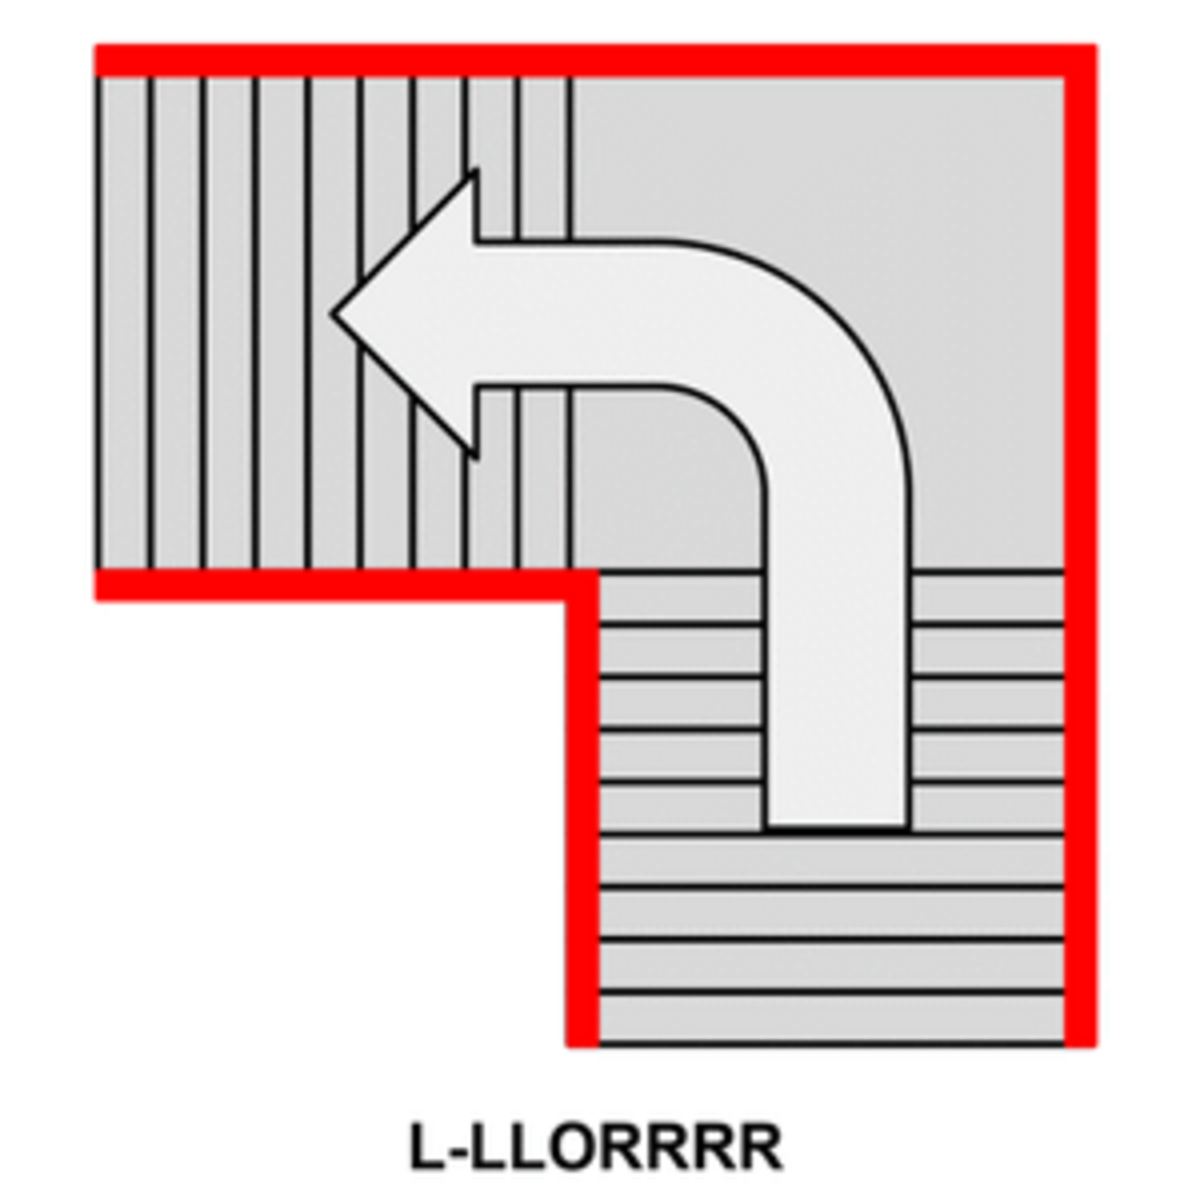
Balustrades for deck stairs that go higher then ten steps
For deck stairs with landing and banisters going higher then ten steps there are of course even more possibilities ( sorry about that).
We haven't had the time yet to explore all the possibilities, but here below you will find the most important ones.
In case you would like deck stairs with landing and banisters turning to the right or to the left, but without banisters on oone of the sides because the stairs will be placed in a corner, or against a wall, just contact our customer service (yep, once more ) and we will calculate for your specific request.
Further information about these balustrade stairs:
(You do not have to choose, we have already done so for you ;-))
The type of steps for your balustrade stairs:
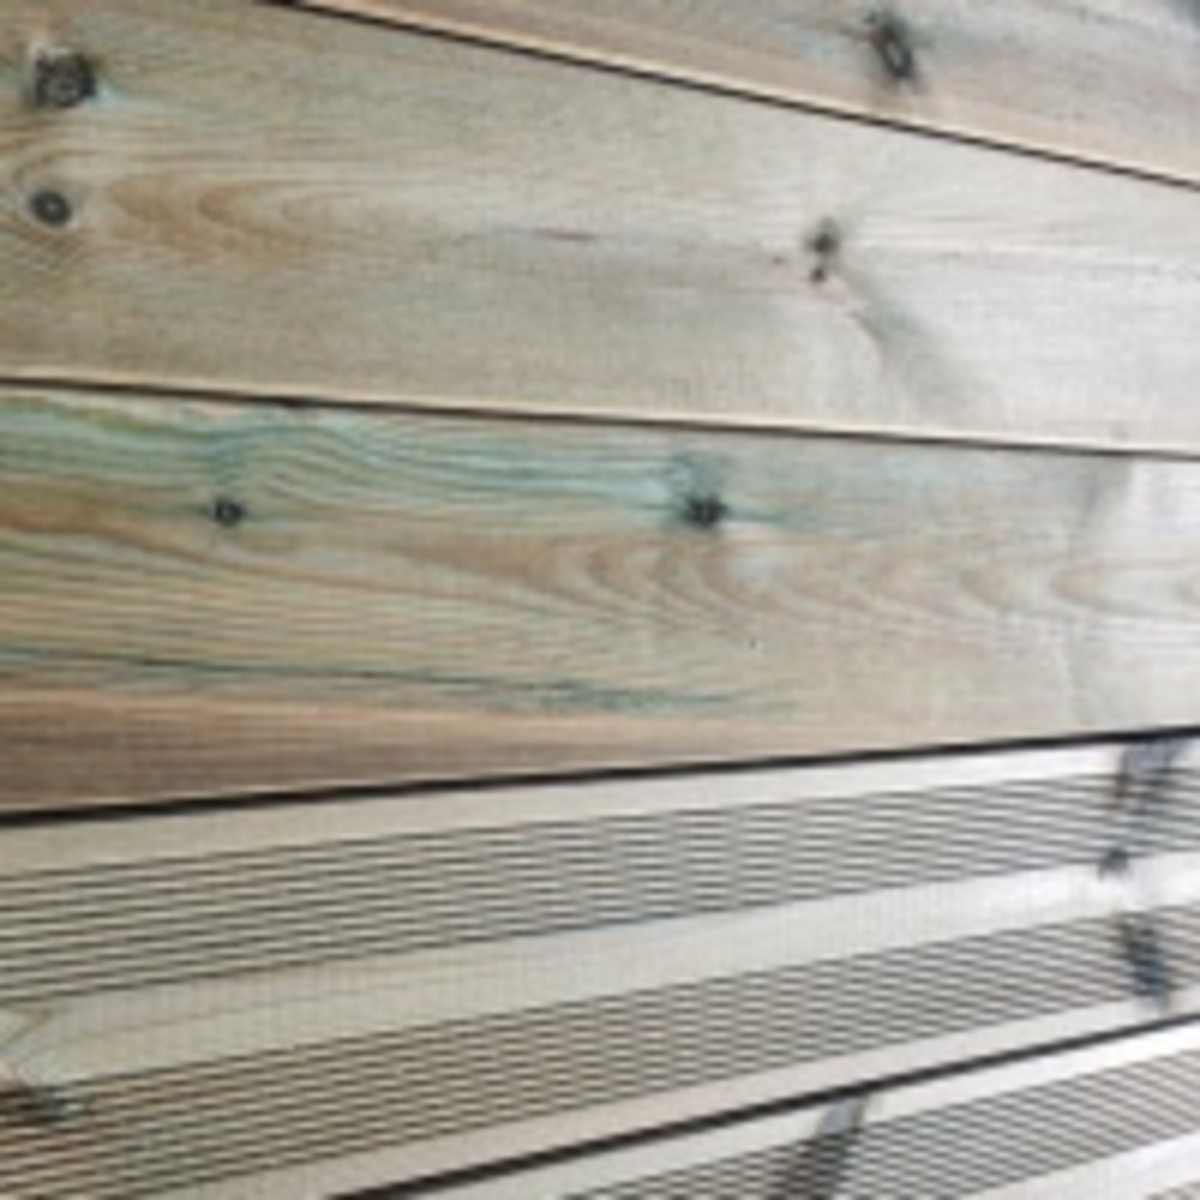
Thos model of balustrade stairs is only proposed with our standard step boards of Type C with a headsize of 27x145mm. For every step, two boards are included. These baords have one smooth side, and one side with thin grooves. It is up to you wehter you wish to turn the smooth side up or the grooved side, just a matter of taste so to say.
For some of the models, we would hae to know by forehand which side you would like to have facing upwards, you can indicate this in the case 'remarks' when placing the oreder, or otherwise we will just give you a call ;-)
With countersteps?
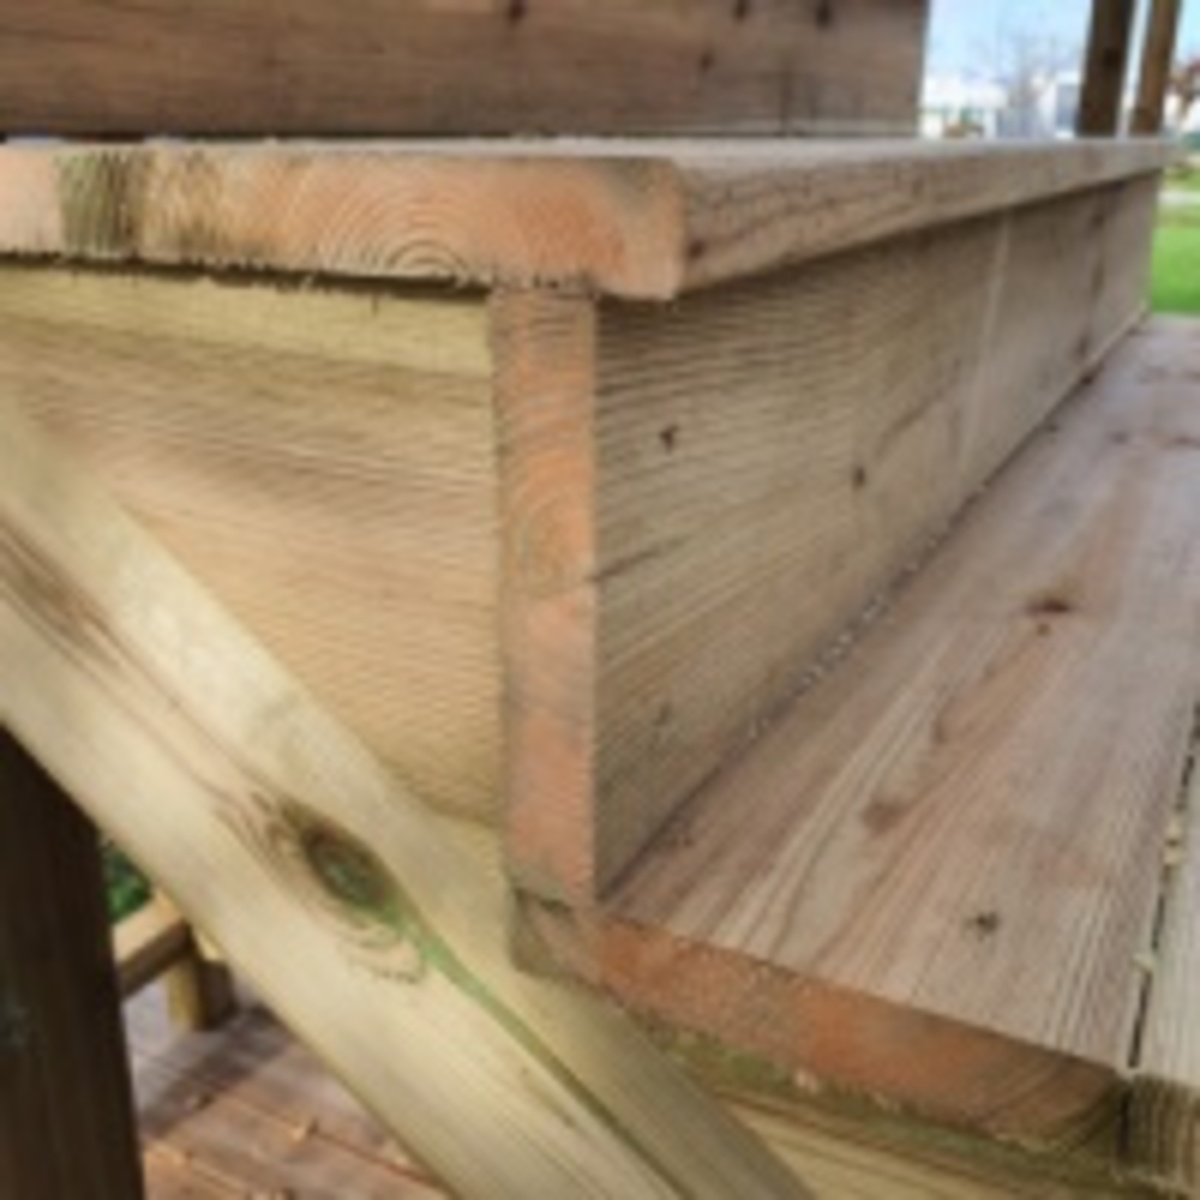
A counterstep or also called riser is the upright plank that closes the space between 2 steps. The riser also supports the step above it and gives more lateral stability to the entire staircase.
We have chosen to offer this balustrade staircase only with riser/countersteps because of safety and stability. Especially important with a staircase of great height.
Type of balustrade:
The stair balustrade for this model is made exclusively of duplo-glued, impregnated, smooth wooden beams of 9x9cm. (actual size after complete drying approximately 85x85mm).
This creates a beautiful, sleek and modern look.
We have chosen to use only duplo-glued posts. Twice as expensive as regular posts, but regular posts tend to work a lot and can start to twist over time. Of course, it's not pretty when your balustrade stairs become crooked due to the working of the wood. With duplo glued posts, you have more assurance that everything will stay nice and straight.
There are also other models available such as the balustrade stairs with round head. Here the posts of the balustrade protrude about 10cm above the handrail. This is a more classic look, choose what you like.
Yessssss, we're finally done...
See ? You are courgeous.
You've read the whole page.
Difficult to choose with these hundreds of variants...
Now you can select your balustrade stairs, put them in the basket and place the order. Depending on how busy we are, it will take us 2 to 4 days to cut everything to size, and prepare your order for shipping, the count 3 to 5 more days for shipping dependeing on the destination, so a total of 5 to 10 days of delivery time.
Is this balustrade stair suitable for public/professional use?
Although the standard balustrade stairs are already amazingly strong, it is better to contact us if you are going to use the stairs for the entrance of your restaurant or café.
When guests are waiting on the stairs with 20 people at a time, or use it in groups as a smoking area, it is advisable to add some reinforcement in the form of an extra stair beam, for example.
Either way, make sure the stairs are extremely firmly attached to the wall and surface when used by the public.
Will the stairs be used as 2-way traffic? Then 120cm wide is a bit on the tight side. In that case, 140/160/180cm wide is definitely recommended. The 180cm wide staircase has 4 stringers under the treads as standard, so it can handle quite a large audience.
How much space does the balustrade staircase take up?
Depending on the chosen height, the balustrade stairs can become quite a menace in your garden.
Below is a table showing the external dimensions of the stairs in the straight or left/right arrangement for a chosen width of 120cm. The stairs of 80 or 100cm wide take up slightly less space.
Number of steps | Straight ahead - length | Straight ahead - width | Left/right length: | Left/right width |
6 steps | 255 cm | 120 cm | 255 cm | 120 cm |
7 steps | 280 cm | 120 cm | 280 cm | 120 cm |
8 steps | 305 cm | 120 cm | 305 cm | 120 cm |
9 steps | 335 cm | 120 cm | 335 cm | 120 cm |
10 steps | 365 cm | 120 cm | 365 cm | 120 cm |
11 steps | 370 cm | 120 cm | 305 cm | 185 cm |
12 steps | 395 cm | 120 cm | 305 cm | 210 cm |
13 steps | 420 cm | 120 cm | 305 cm | 235 cm |
14 steps | 445 cm | 120 cm | 305 cm | 260 cm |
15 steps | 470 cm | 120 cm | 305 cm | 285 cm |
16 steps | 500 cm | 120 cm | 335 cm | 310 cm |
17 steps | 530 cm | 120 cm | 365 cm | 335 cm |
Shipping and delivery of the balustrade stairs
Unfortunately, it is very expensive to ship posts longer than 260cm abroad.
Therefore, we cannot ship the Balustrade stairs 16 and 17 steps high outside of mainland France (It would be possible but then you have to count on about 600€ transport costs...)
Assembling the building kit
Although we try to prepare as much as possible, assembly can be quite tricky in some cases. This depends mainly on the conditions in your garden.
Let's put it this way, if you have trouble with a closet from Ikea, then assembling such a large balustrade staircase might be a bit too much. Ask help from a neighbour or that nice uncle who is good at DIY, a bit of experience and insight does come in handy!
For the total assembly of the largest model, it is better to take a whole day. A model up to 10 steps is a morning (or afternoon)'s work.
Which tools do you need?
Good tools are half the battle, and they really are! Yet you don't need that many, below is a list:
- a rubber mallet
- a pair of tension clamps, useful as a 3rd and 4th hand, to hold the beams in place when you drill into them and screw them in.
- a screwdriver/drill
- a tape measure and square
- a spirit level (can be done without, but it is safer if everything is straight)
- 1 wood/steel drill bit 3 mm
- 1 long wood drill bit 6 mm (supplied by us free of charge)
- screw bits TX20/TX25/TX40 (supplied free of charge)
A level ground surface is important!
First, make sure the surface is completely flat, firm and level.
Spend some extra time on this to avoid problems.
The highest staircase, including the balustrade, is 400cm high. If the lower leg is at a slant of 2 or 3 mm, you will soon have a difference of a few centimetres at the top.
Make sure the legs cannot sink into the ground because then the whole staircase will sink and that would be a shame.
Why do I still need to pre-drill holes myself and where?
Pre-drill into the step boards:
The holes in the step boards are not pre-drilled. Marking out the holes takes a lot of time and therefore money. The largest staircase would easily cost 300€ more if our staff did it for you, so you can quickly earn that money yourself.
Furthermore, we then have to number all the planks, so you have to search which one to use, also less convenient.
Besides, pre-drilling these boards is not absolutely necessary. Personally, I never do it. A board may split on the outside when you screw in the screw without pre-drilling. That's technically not a problem, but some people don't like that as much. Anyway, wood always works. Over time, dry cracks will appear in the boards anyway. I'm not worried about a crack more or less, that's the charm of wood. Anyway, we leave that choice to you.
Pre-drilling of screw holes for mounting the vertical beams of the balustrade stairs:
The fact that we do not pre-drill these holes has a technical reason. Believe me, NOTHING is straight.
In my life, I have renovated an old building in Nijmegen city centre and an old farmhouse in France. I also sometimes help family and friends in newly built houses.... nothing is straight, nowhere, really.
Well, nice you will say, but what does that have to do with my balustrade staircase?
Simple, in your home and garden, it's not 100 per cent straight either. If we were to pre-drill the holes of the vertical beams, you will have a problem when mounting it because it won't fit.
As we wrote above, if the ground is uneven by a few millimetres, you have a difference of a few centimetres at the top. I'm also sure that the wall or terrace or balcony that you put the stairs against is not 100% plumb.
So let's leave the top beam of the stair balustrade at the top 2 cm longer than necessary according to the calculations.... you probably won't even notice. You would notice when it is too short, though, which is not pretty.
And the beam is better to be too long than too short right? Too long then you can still saw something off... too short? Well... sticking wood to it is difficult.
Furthermore, some customers find that 3 beams for the balustrade are not enough. If we pre-drill, you can't add any. Now you can, just contact customer service and for a small extra charge you will receive extra balustrade beams.
Incidentally, we supply extra support posts with the balustrade stairs to help you mount the vertical beams of the stair balustrade. You put these posts on the stair treads, place the beam on top and it will be exactly at the right height for pre-drilling and screwing.
No problem at Vinuovo, we're thinking with you this summer! ;-)
What is included in this balustrade stair building kit?
A balustrade staircase kit contains everything you need to make your own outdoor balustrade staircase.
In our own workshop, we cut everything to size for you.
The kit contains:
- All wooden beams, stringers and planks you need
- Stainless steel screws in various sizes from the brand Reisser
- 1 long wood drill bit 6 mm
- screw bits TX20/TX25/TX40 (if necessary)
- Galvanised steel corners with stainless steel screws (if needed)
What is not included?
- items for fixing the balustrade stairs to the wall
- stuff for fixing to the ground, if necessary
- any other tools you may need
Why isn't that included then? We don't know your wall, balcony, terrace or surface. So we don't know what you need.
As for tools, we hope you have your own ;-)
Assembly instructions balustrade stairs
We will make the assembly instructions including photos and videos available after your purchase. We then share a link with you where you can find all the information.
Why do we do this?
We have spent a lot of time and money developing this kind of staircase and building prototypes to find the right sizes.
Unfortunately, we have found that the competition also likes our ideas, so we don't want to make it too easy for them to copy everything.
This is a bit annoying for you, but we would like to protect our ideas.
Thank you in advance for your understanding.
How do I attach the balustrade stairs to the wall?
Fixing your outdoor stairs to the wall or a terrace can be a tricky job. It depends on the wall.
For tips & trics, read our blog post: How to attach outdoor stairs to a wall, balcony or terrace?
How do I fix the balustrade stairs on the ground surface?
For more information on how to fix a wooden post, outdoor stairs, a fence or pergola to the ground, read our blog post: How to fix a post in the ground?
Can I also use this balustrade staircase inside the house?
Of course you can.
If something is suitable for outdoors, it can usually also be done indoors. The reverse is better advised against.
The finish of an outdoor staircase might be a little less beautiful than for a nice indoor staircase built by a real specialist. The price will also be different, so that's a choice you have to make.
You can improve the finish of the balustrade staircase yourself, a little sanding, a good stair paint on it, and it already looks very different.